Dell PERC 3/DC / MegaRAID Elite 1600 Battery Replacement
Updated 6-Apr-2012: BatteryPrice no longer lists the HF-C1U battery. Please refer to my comment at the end of this post for more information.
The Dell PERC 3/DC RAID controller (a re-branded MegaRAID Elite 1600) was a very popular RAID controller on older server systems. Here is a picture of the Dell version:
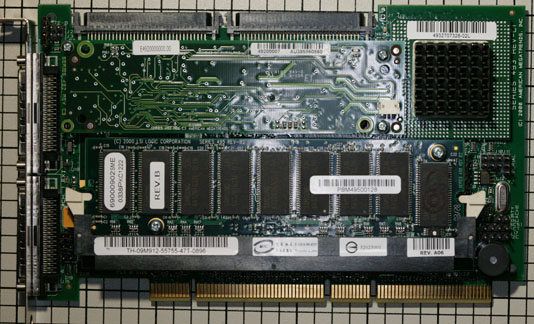
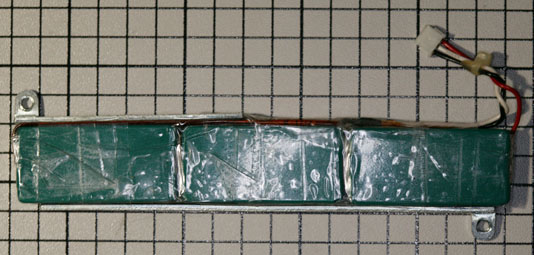
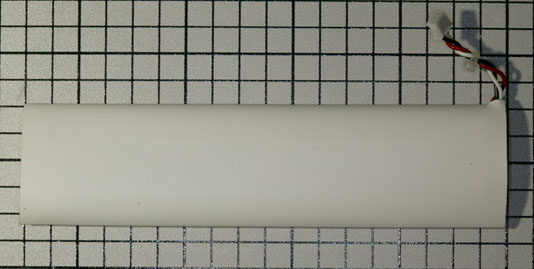
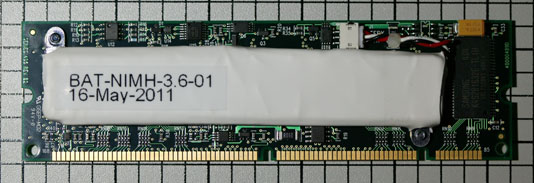
This controller was available with two different battery backup options – the normal “Battery Backup Unit” (BBU), and a “Transportable BBU” which was mounted on the back of a custom memory module. For some reason, Dell PERC 3/DC cards have both the regular BBU and the transportable one installed, but the battery is only installed on the transportable BBU. All of the 50 or so of these controllers that I’ve seen have both installed. The battery on the memory module gives new meaning to the term “Battery Backed RAM”:
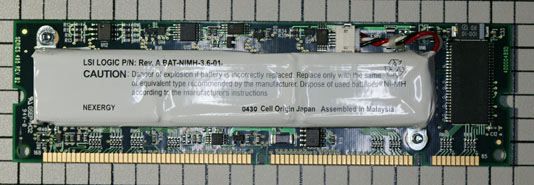
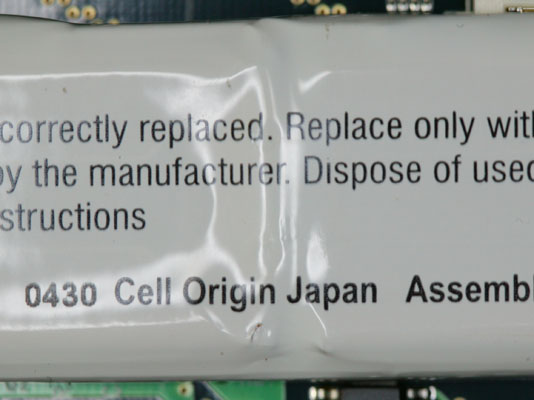
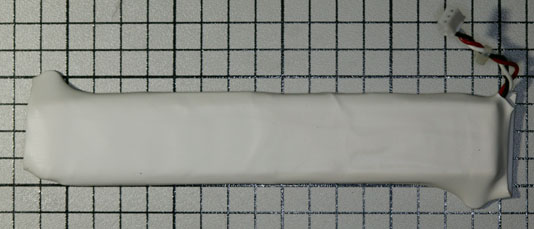
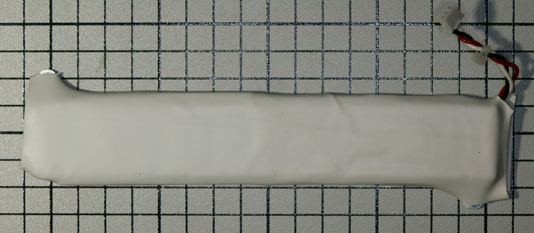
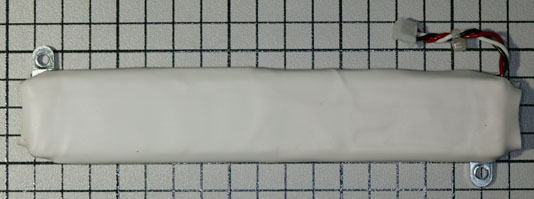
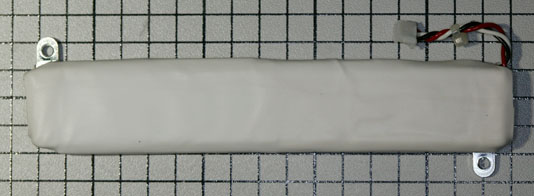
Unfortunately, these batteries are well past their useful service life. They no longer hold a charge and many have started to leak. Take a look at the bottom center of the white plastic wrapper in this picture:
Several years ago, I contacted LSI Logic (who purchased the MegaRAID product line from AMI a long time ago). Unfortunately, they could no longer provide the battery module as it was an obsolete part. At the time, I was able to salvage batteries from my spare controllers (or so I thought – more on this in a bit) and use them on my production boards.
Recently, I had a number of systems start reporting “Charge failed” or “Battery pack missing” for their battery status. So I began investigating replacement batteries again.
I contacted the original manufacturer (Nexergy) as well as a number of custom battery pack manufacturers. Unfortunately, all of the ones that replied stated that they could not produce the battery pack. Nexergy said “This is an obsolete part and the cell you have as well as the tooling to make the pack is no longer available to us.”
The only references I could find on the Web, searching for the part numbers on the battery – 4920100000 or BAT-NIMH-3.6-01 – were from other people looking for replacement batteries, or from companies wanting to sell used controllers (which would also have bad batteries on them).
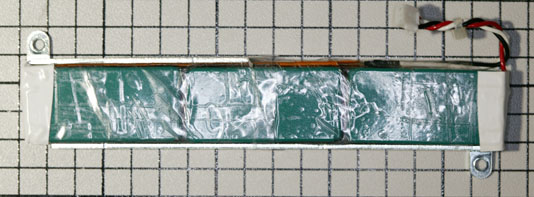
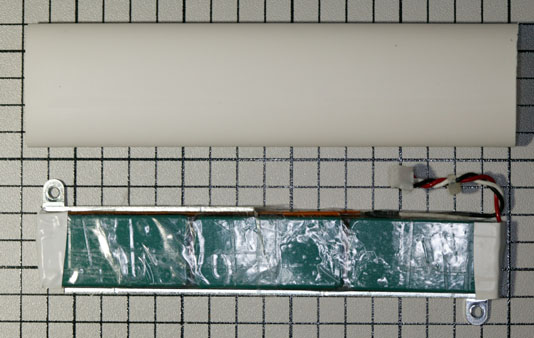
Therefore, I decided that if I wanted to have working battery backup packs, I would need to make replacements myself. My first step was to remove the battery from the memory module and un-wrap the outer whiite plastic casing:
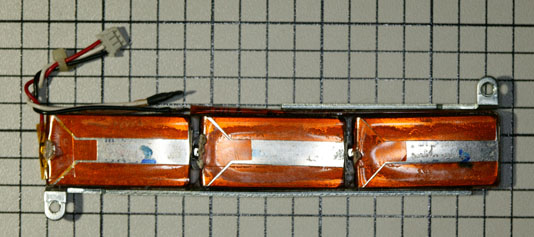
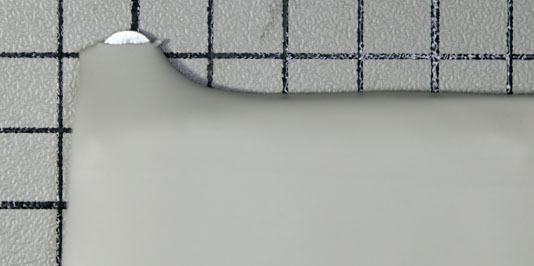
As I had suspected, there was a lot of corrosion where the chemicals had leaked out of the battery:
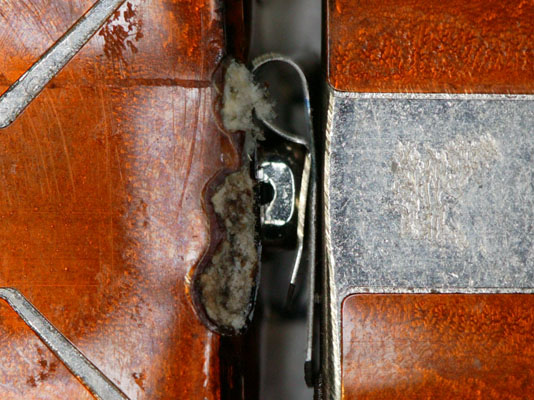
Fortunately, I was able to determine that the actual batteries inside the module were of a standard size, known as a HF-C1U (PDF spec sheet here). That meant that I could purchase replacement cells and assemble a new module by re-using the existing brackets and wiring harness.
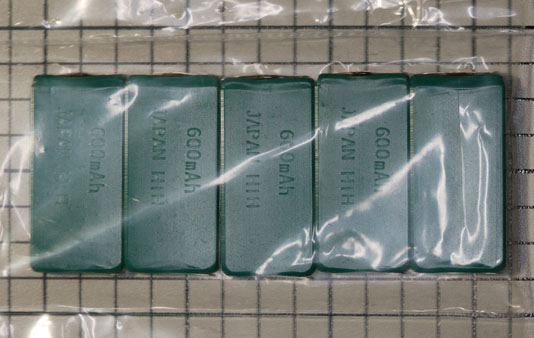
The HF-C1U battery is becoming difficult to find, as it is nearly obsolete. I located a large quantity at a company called BatteryPrice. They also offered the batteries with an option to have solder tabs installed on the batteries. It is important to get batteries with this option, as the normal variety without the tabs will be impossible to solder. I placed an order for batteries and they arrived in two days:
If you decide to perform this repair yourself, I suggest you order additional batteries as you may damage some when soldering them.
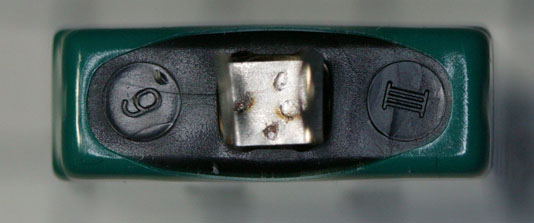
I soldered three of the batteries together, with the positive terminal of one to the negative terminal of the next one. It is important to have the correct polarity. One end of the battery will be a solid metal plate – that’s the negative end. The positive end will have a small metal button on a mostly-plastic plate. Here’s a view of the positive end, with the solder tabs bent up to provide clarity:
Next, I used clear plastic shipping tape to hold the 3 new batteries together, by wrapping each of the 2 connections with tape:
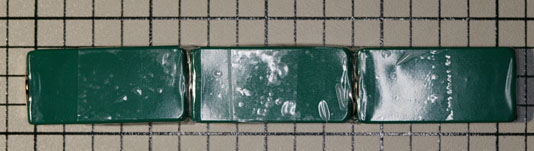
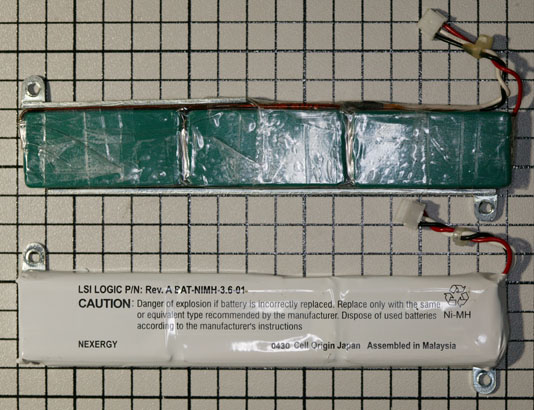
Here is a comparison of the old string of batteries and my new set:
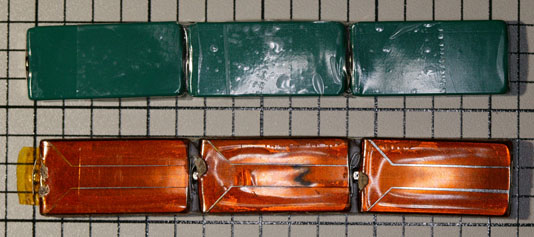
Next, I carefully removed the cable and strap from the old battery pack. The red wire was unsoldered, which let me lift up the whole assembly from the string of batteries. The strap is spot-welded to the end of the old batteries, so I peeled it back and carefully cut it off to leave as much of the strap as I could, for soldering onto the new batteries:
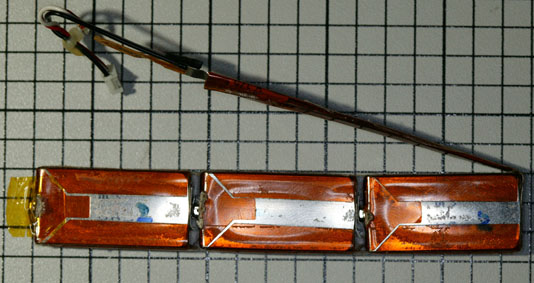
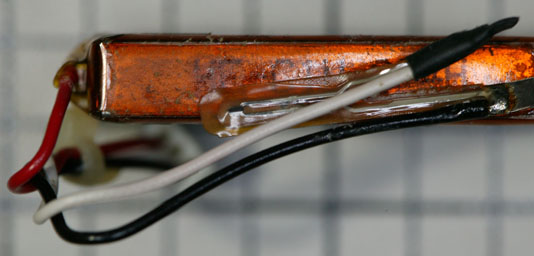
In addition to the wires and the strap, there is a thermistor (thermal sensor) which the controller uses to limit the charge rate of the battery. Here is a close-up view – the thermistor is the angled piece connected to the white and black wires:
After removing the old cable and strap assembly, I soldered it onto the new string of batteries. The red wire connects to the positive terminal, and the end of the strap connects to the negative terminal at the other end of the new string. I then used more clear plastic shipping tape to mount the two metal brackets and to hold the thermistor close to the side of the battery pack:
Here is a comparison of the old and new batteries. It is important to correctly position the brackets so that the spacing between the holes is the same as on the old battery, and that the brackets are aligned with the back edge of the batteries so there is no gap between the brackets and the circuit board when installed:
The next step is to enclose the completed battery pack in an insulating material. The original wrapper was unusable, as I had to cut it in order to remove it. I decided on a combination of electrical tape and heat shrink tubing. A complete wrap with electrical tape would probably work as well, but wouldn’t look as nice.
The first step is to use electrical tape to cover both ends of the battery pack, since the heat shrink tubing will leave that area exposed:
Next, I cut a piece of 3/4″ diameter heat shrink tubing (3M part number 5174-1345, available from Mouser Electronics). The tubing is slightly longer than the battery pack. We will rely on this in order to shrink the ends:
I cut a small notch in one end of the tubing to accomodate the power cables and slid the battery pack into the tubing:
Next, I used a heat gun (a hair dryer would also work) to start shrinking the tubing onto the battery pack. It is important to go slowly to avoid overheating the batteries, which could damage them:
I used a razor blade to carefully remove a small piece of the tubing where it was pulled against each mounting tab:
Here is a close-up of the tubing cut at the tab:
I then used the heat gun to complete the shrinking of the tubing, which fully exposed the tabs:
In the previous picture you can see the extra heat shrink tubing on both ends of the battery. The next step is to trim that down to a reasonable amount:
Now we’re finally ready to mount the battery on the memory module. Because the heat shrink tubing is a bit thicker than the original wrapper, we need to add some spacers between the circuit board and the battery at each of the two screw locations. The best bet would be some nylon spacers, but I only had metal ones. If you use metal ones, make sure they’re small enough to not short out any of the wiring on the circuit board. I also made up a label with the part number and date of assembly:
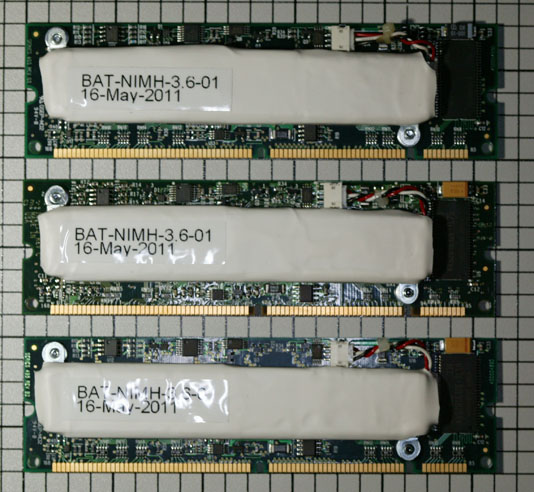
I went ahead and made a number of additional battery packs so I could get them charged before replacing the bad batteries in my systems:
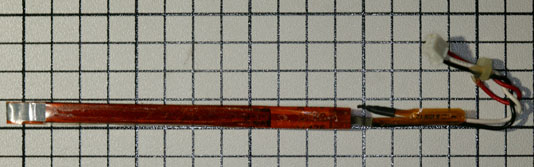
The batteries are shipped in a partially-charged state, normally about .8 volts compared to the labeled 1.2 volts. I made a simple power adapter using two pieces of solid CAT 5 wire, so I wouldn’t have to poke around on the memory module itself:
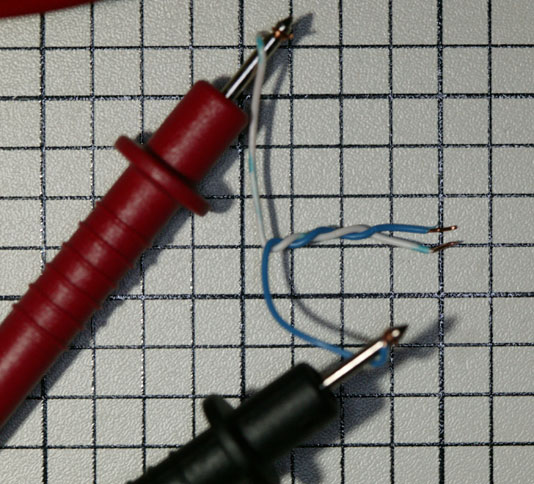
Here is how the adapter is used:

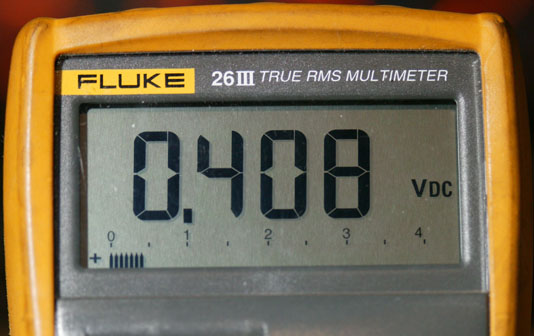
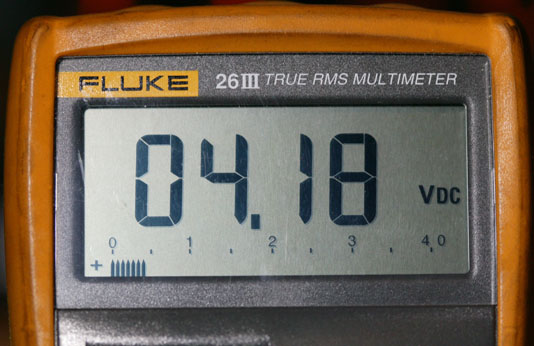
This is the reading from one of the dead original battery packs, showing a voltage of approximately 0.4 volts. This battery has been discharged beyond recovery and can never be recharged:
It is important to note that the system this battery was used in (both the controller BIOS menu and the operating system) thought this was a perfectly good battery, despite it being completely dead. With only the positive and negative wires and a temperature sensor, the controller can’t really tell what the state of the battery is without trying to use it. This controller doesn’t have the capability of scheduled or on-demand battery tests – that came later with the 3Ware controllers.
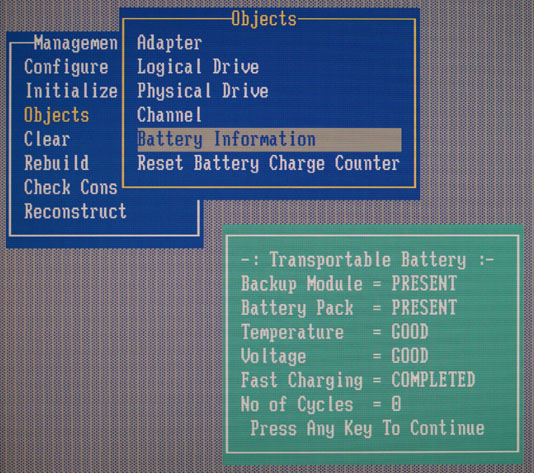
In fact, I never found the BIOS display to say anything other than that it is completely happy with a battery:
Once I booted the operating system (FreeBSD, in this case) I was able to see more useful data. Each amrstat command was issued about a half hour apart, showing the pack as charging and eventually done:

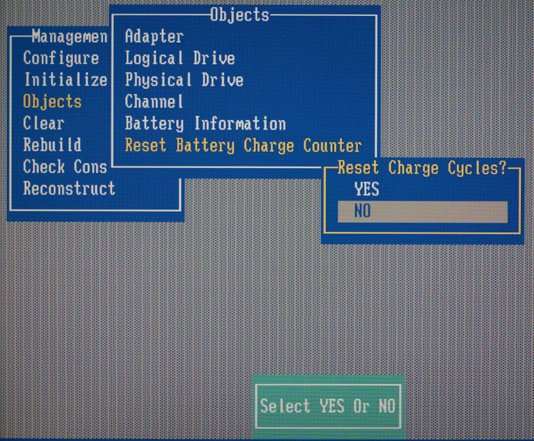
It is probably a good idea to go into the controller’s BIOS setup menu and reset the charge count to zero:
After letting the battery charge for 12 hours, I removed it and measured the voltage again. The reading of around 4.1 volts is the expected value for a just-charged 3.6 volt battery pack. It will decrease over time, and when it falls below a certain value, the controller will begin charging again:

April 7th, 2012 00:43
A reader emailed me yesterday to ask if it was possible to use other batteries, such as ones from a cordless phone.
While researching the answer to their question, I discovered that the BatteryPrice link in my original post now returns a “Product not found” error. They don’t seem to stock this battery any more. Mouser shows 1 piece in stock (without tabs) and a 6 week lead time.
Shenzen Oceansun Battery seems to be a manufacturer that can still make this battery, but they have a minimum order quantity of 1000 pieces. And those don’t have the solder tabs, either.
If anyone comes up with another solution (or can still obtain the battery from BatteryPrice) please post a reply here in the comments.
April 19th, 2013 19:17
Hi, Terri. Is there a PM function on this site? I have a few off-topic questions I’d like to ask.
April 19th, 2013 21:45
There’s no PM function per se, but the “Contact Info” link near the bottom on the right side of each page gives my email address. I’m not posting it inline here in order to try to keep the spam down to a dull roar…