Brady TLS2200 battery pack rebuild
I have a pair of Brady TLS2200 labelers which are still heavily used. This model was discontinued by Brady in early 2016 and supplies for it are becoming more difficult to find. There is still a good assortment of labels and ribbons available on eBay, but reasonably-priced, functional batteries are another issue entirely.
Brady will still sell you a battery for $119.99 (plus shipping) but as they haven’t sold this printer in over 7 years, it likely that even “new” batteries will not perform as expected.
A company named MTO Battery offers a battery rebuild service for $55. Unless that also includes a prepaid mailer and return shipping, you still have to pay for shipping.
Brady also offered a battery eliminator but it is also discontinued. They’re quite rare on the used market, presumably because most people still using these printers need them because their batteries are bad.
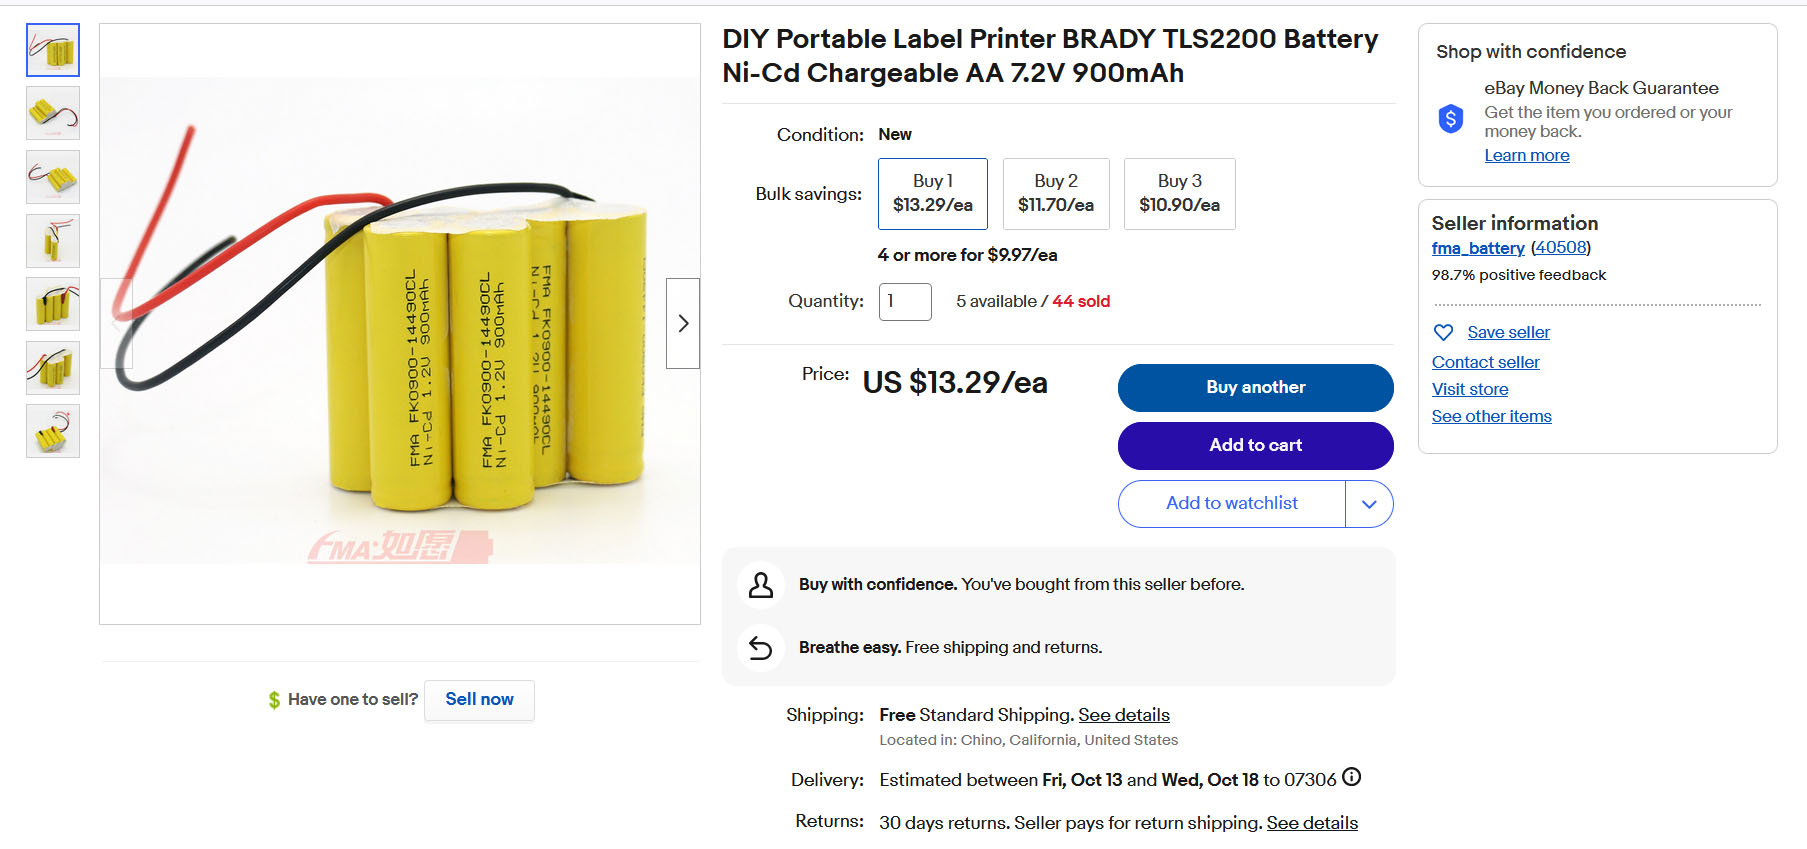
That left me with three alternatives, none particularly appealing. I found that a company named FMA Battery was selling assembled battery cells (only, no case) for the TLS2200 on AliExpress. Unless you’re buying quite a few of them, it will probably be easier to order them from the FMA Battery eBay store. Here is an example listing. In case the listing is gone by the time you read this post, here is a screenshot:
You will need the following tools and supplies:
- One or more TLS2200 battery packs
- A matching number of new batteries
- Soldering iron and solder
- Diagonal cutters
- Single-edge razor blade
- Blue painter’s tape or equivalent
- 1/2″ chisel
- Black silicone adhesive sealant
- Gel-type cyanoacrylate glue (superglue)
- (optional) Labels showing the date the battery pack was rebuilt
- (optional) Marker pen
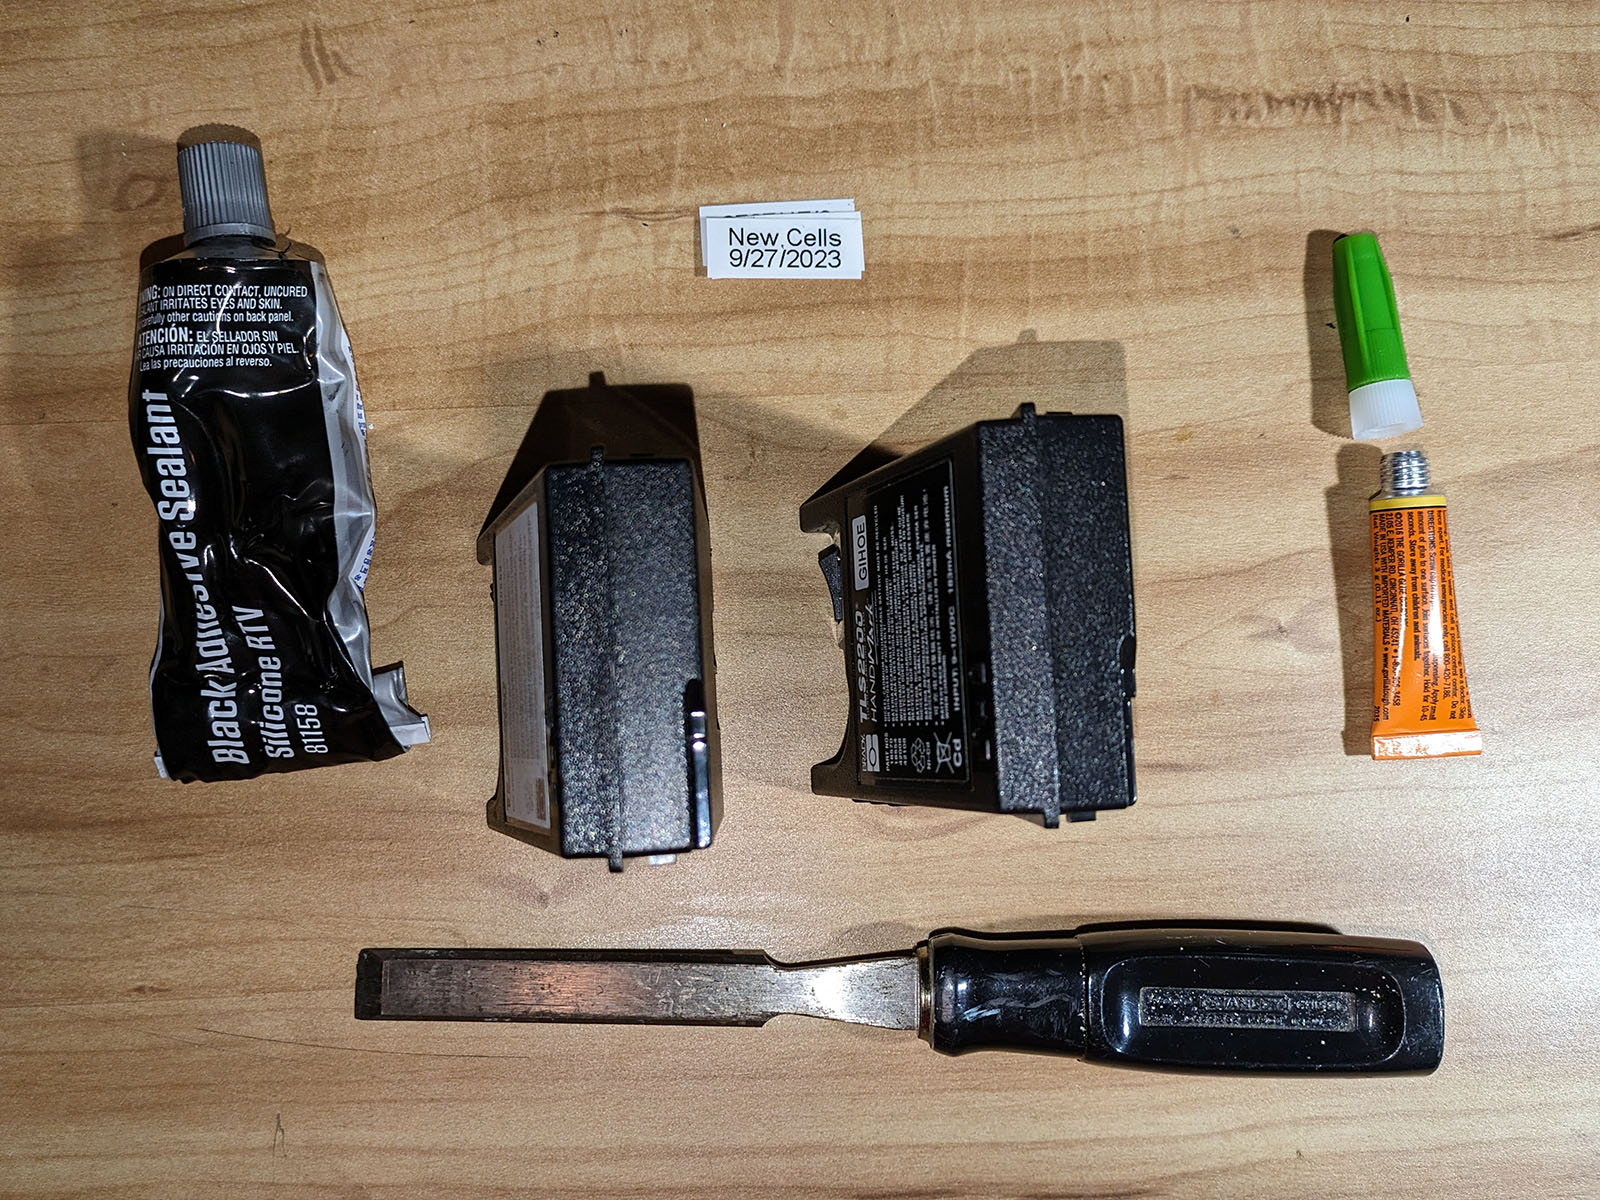
Some of those are shown in the following picture:
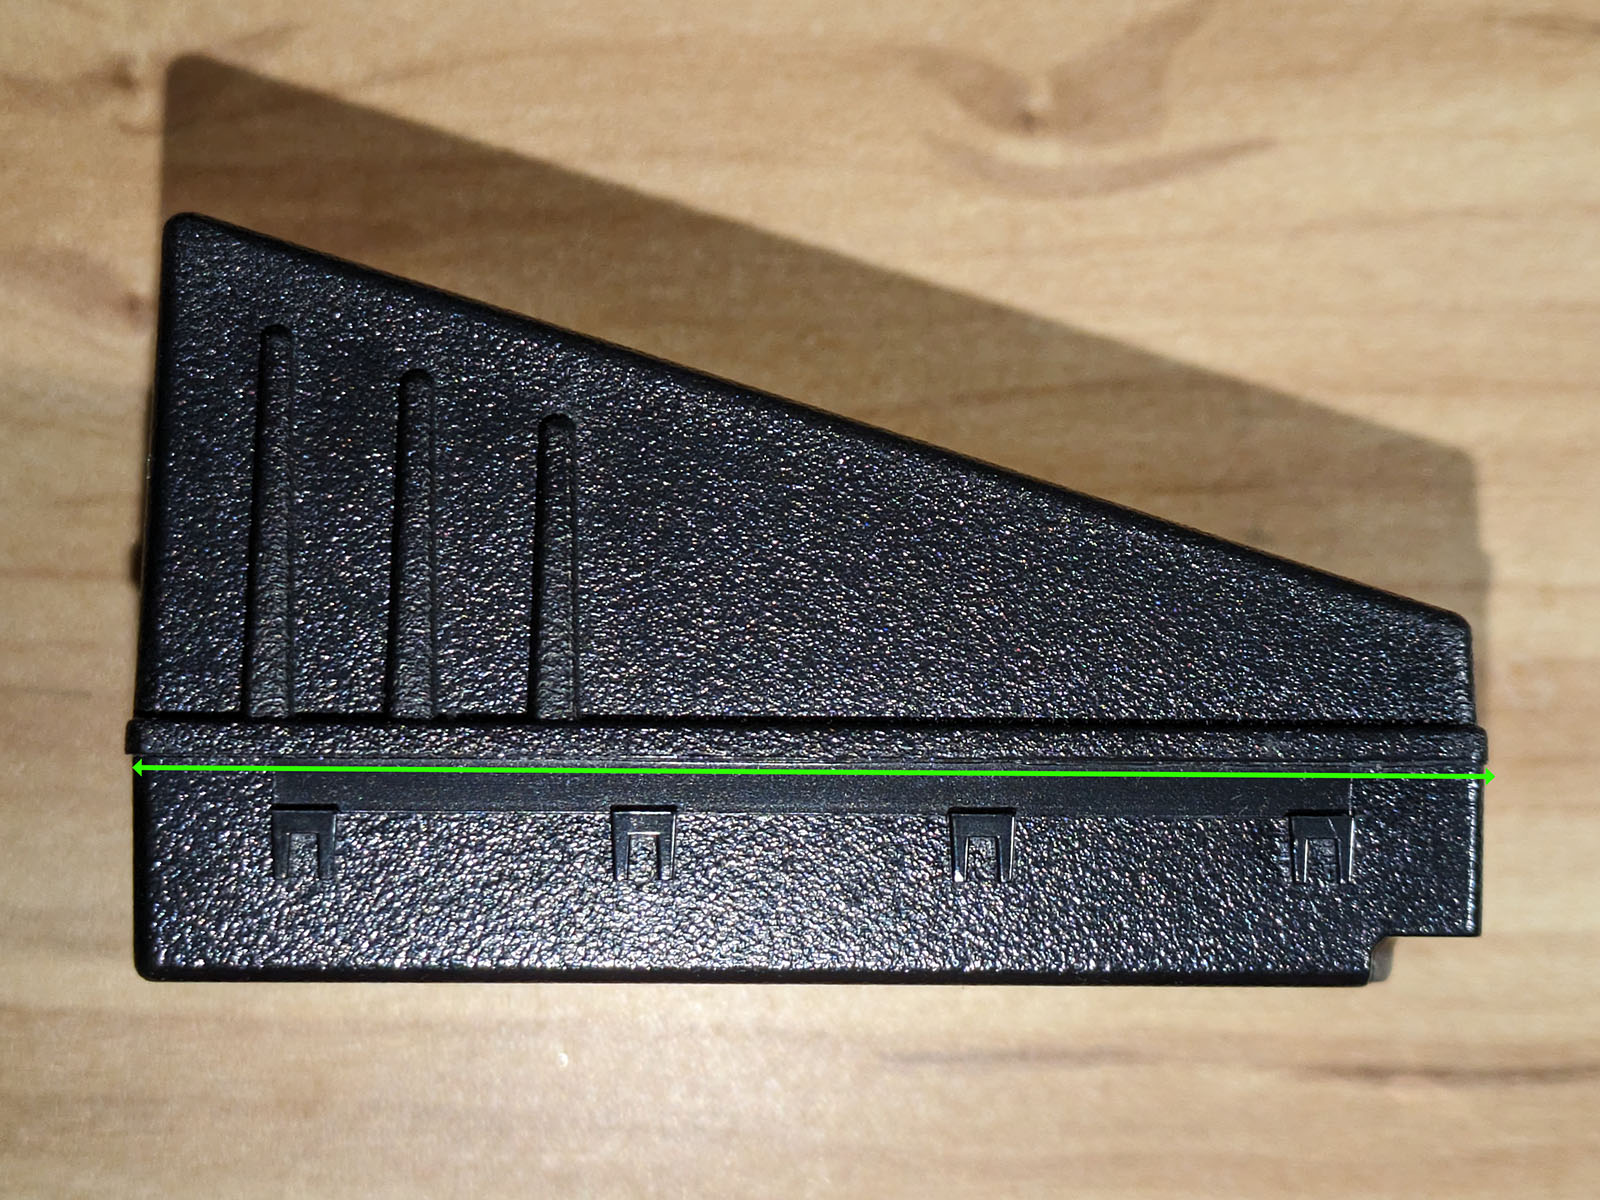
You will need to use the chisel to carefully cut the pack at the seam between the upper and lower halves of the pack. The area to chisel is shown by a green line in the following picture. It continues around the other 3 sides of the battery as well. On the two long edges this is at the location shown in the picture, just below the protruding lip. On the two shorter edges there is a visible seam you can chisel.
You are not trying to split the pack open with a single (or several) chisel strokes, just to crack the halves of the battery. A single light tap repeated along all four edges should be sufficient. When you have finished, stand the battery up so that the shortest piece is on top and tap on one corner with the chisel. The halves should begin to separate and you can use the chisel as a lever to separate them further.
It is important to not apply too much force with the chisel. You can always chisel around the edges again, but recovering from a shattered battery is more difficult.
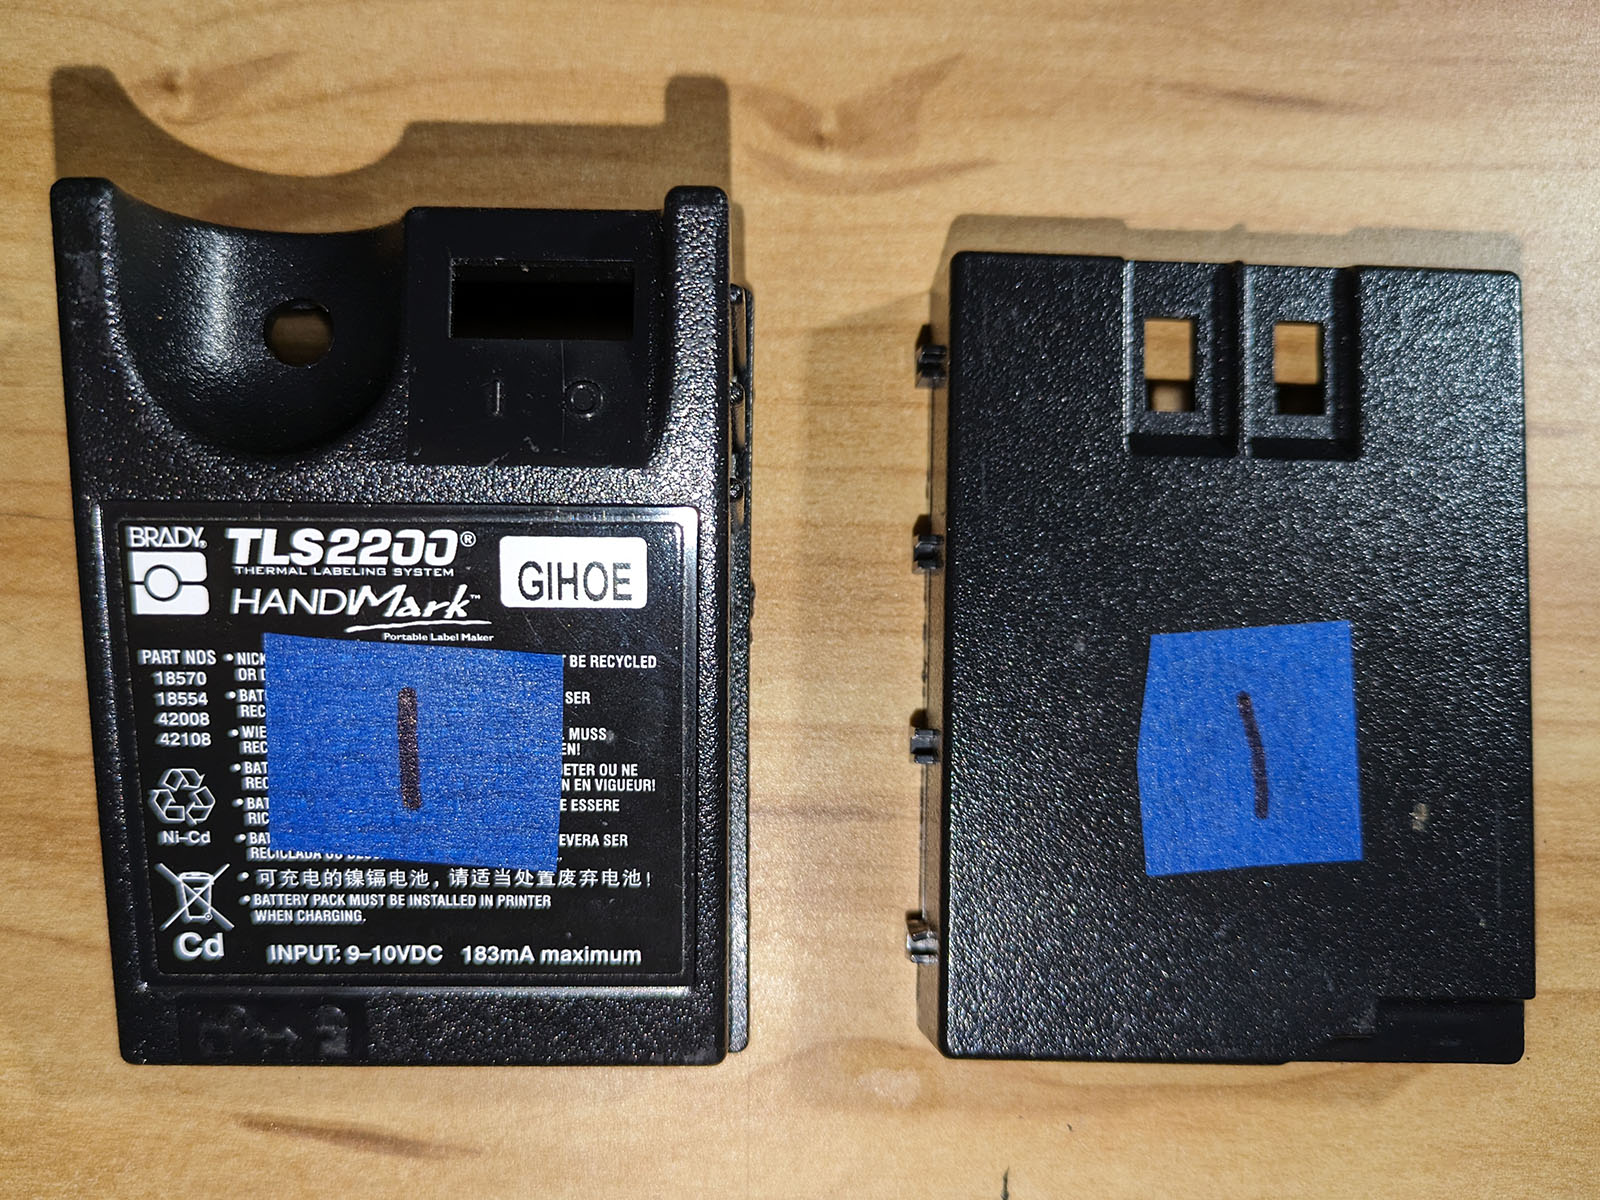
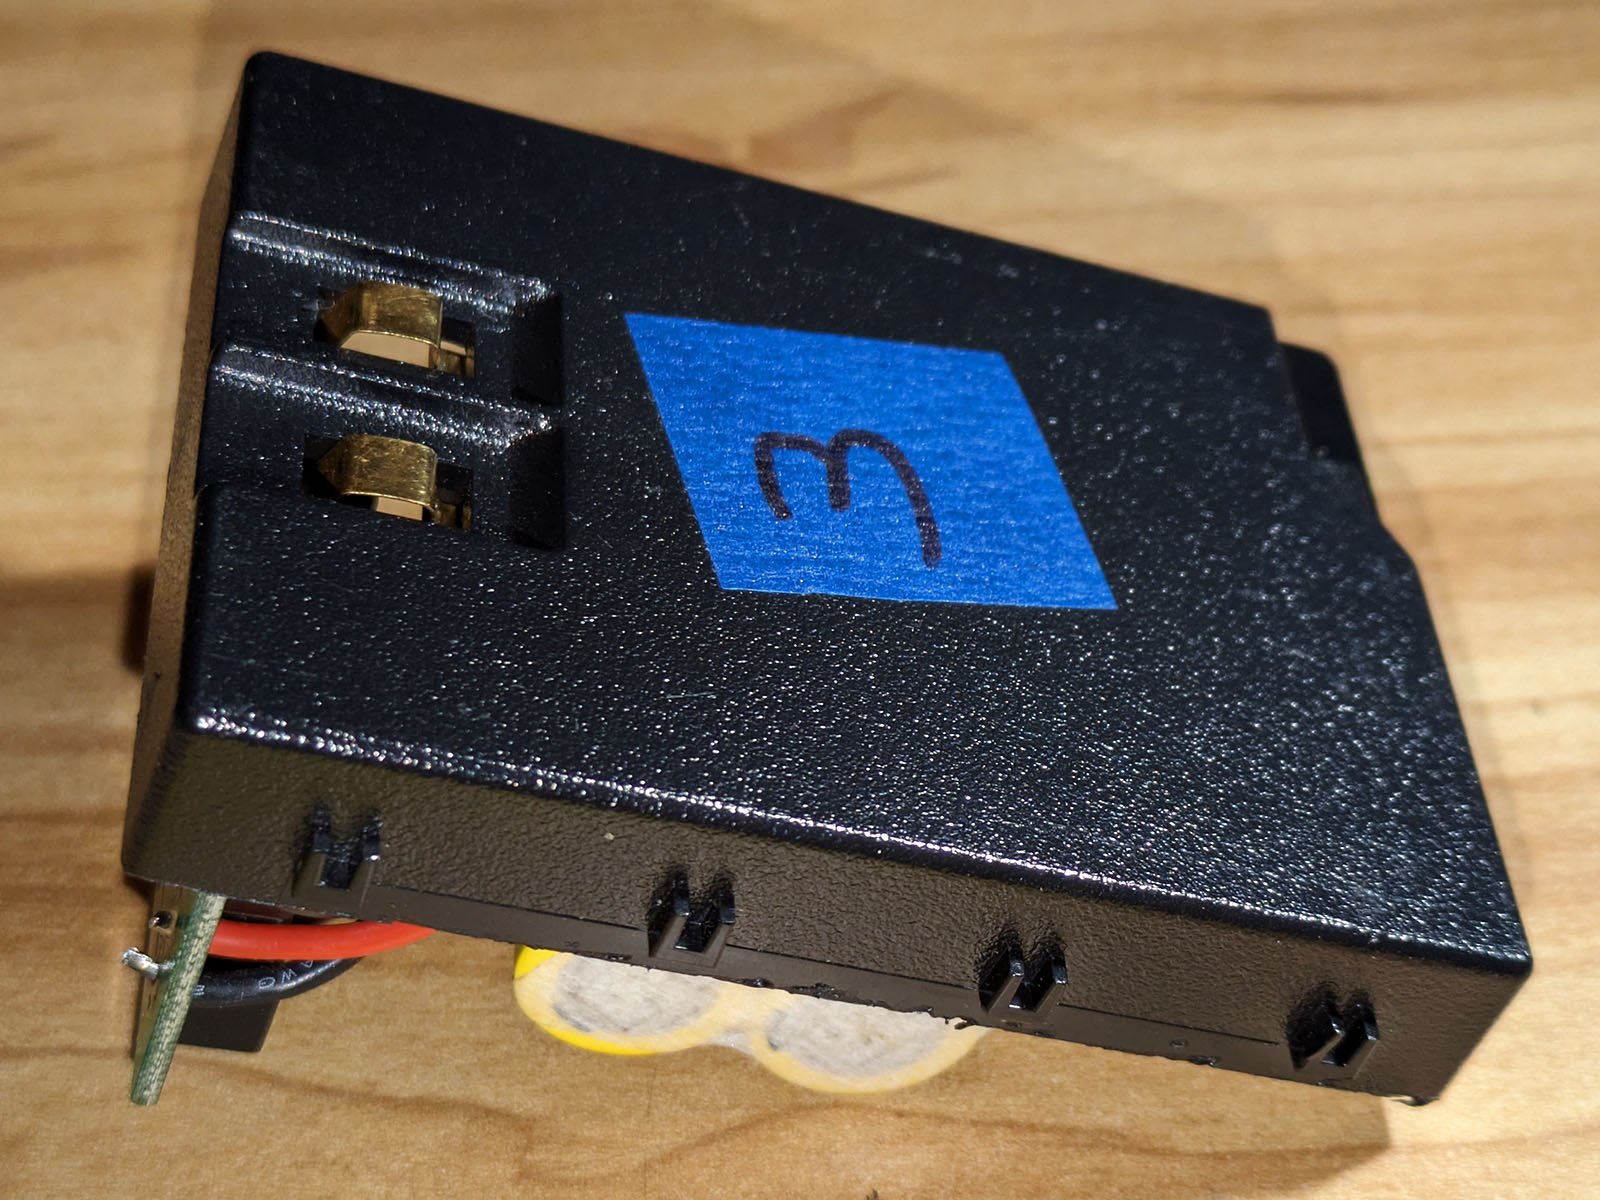
If you are rebuilding more than one battery pack at a time, it is important to label the two halves of each battery with a unique number using painter’s tape and marker so you know which top goes back on which bottom. The plastic will split unevenly and you won’t be able to properly reassemble the battery if you have mismatched pieces. Note: This picture was taken after the battery case was disassembled, to show the labels on each half. You should apply the labels to each piece before separating the halves.
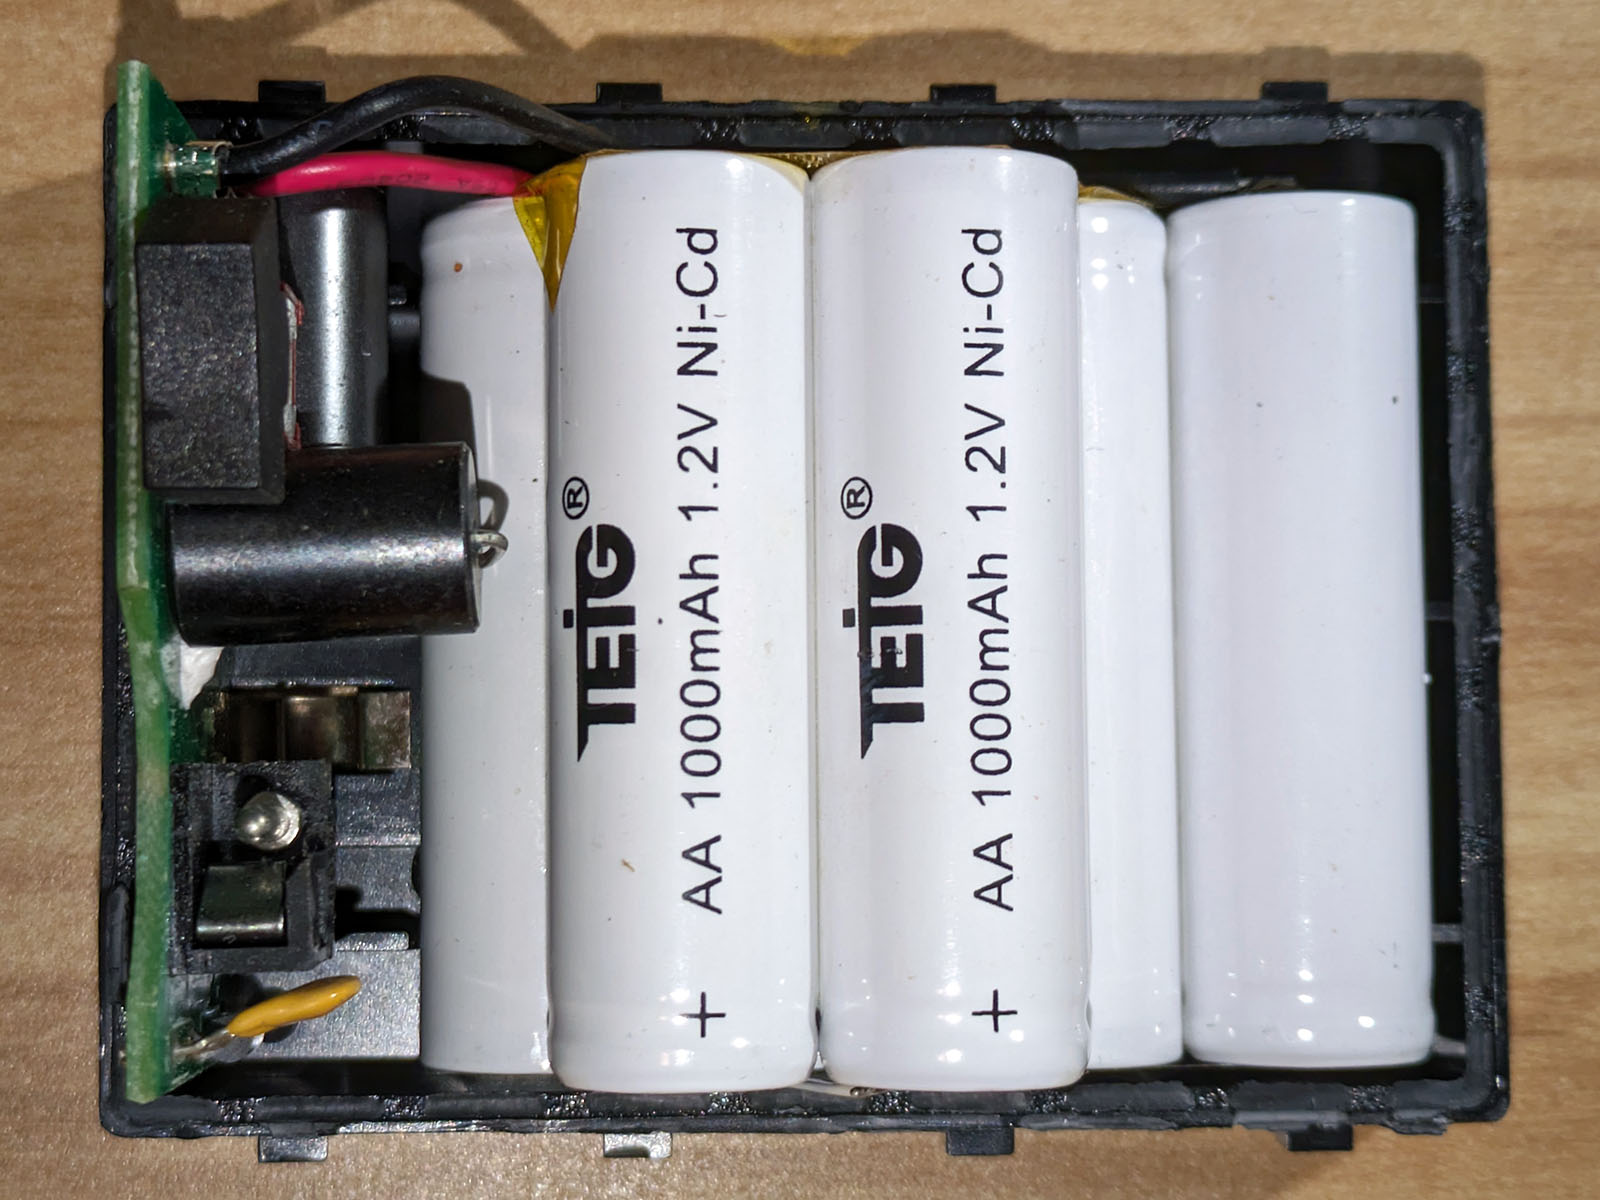
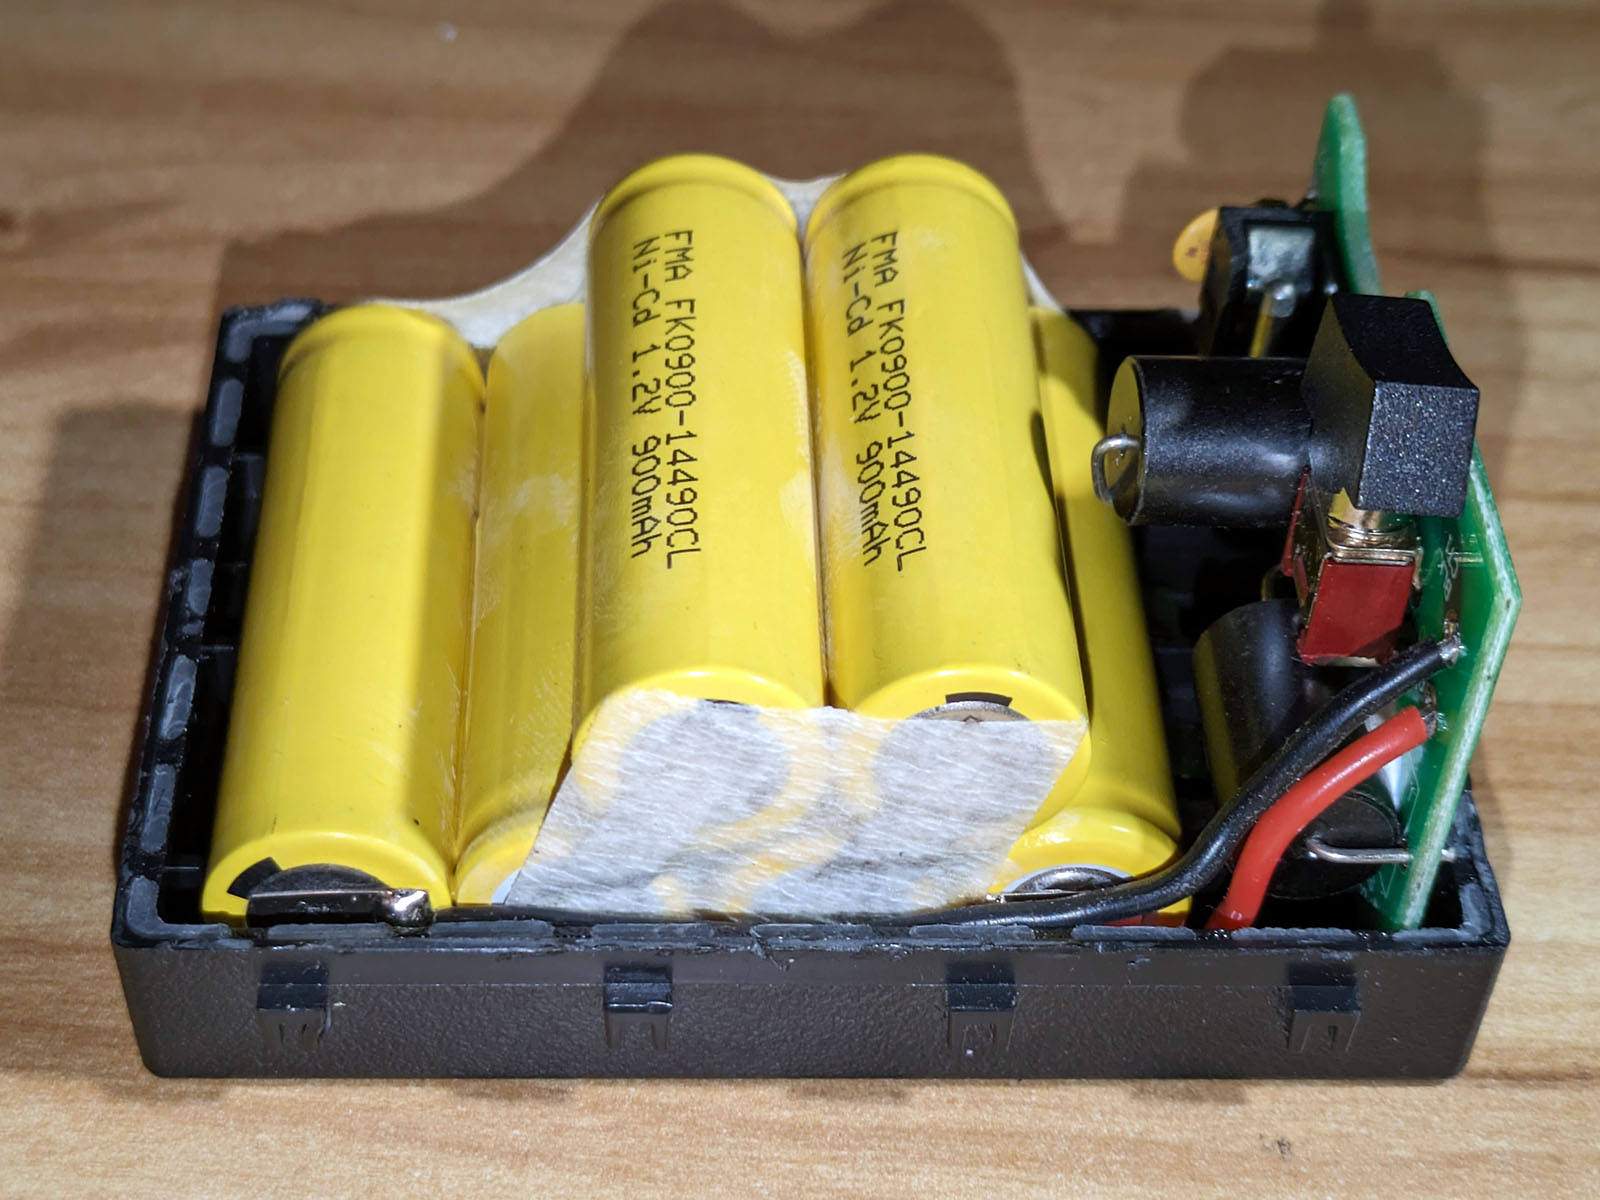
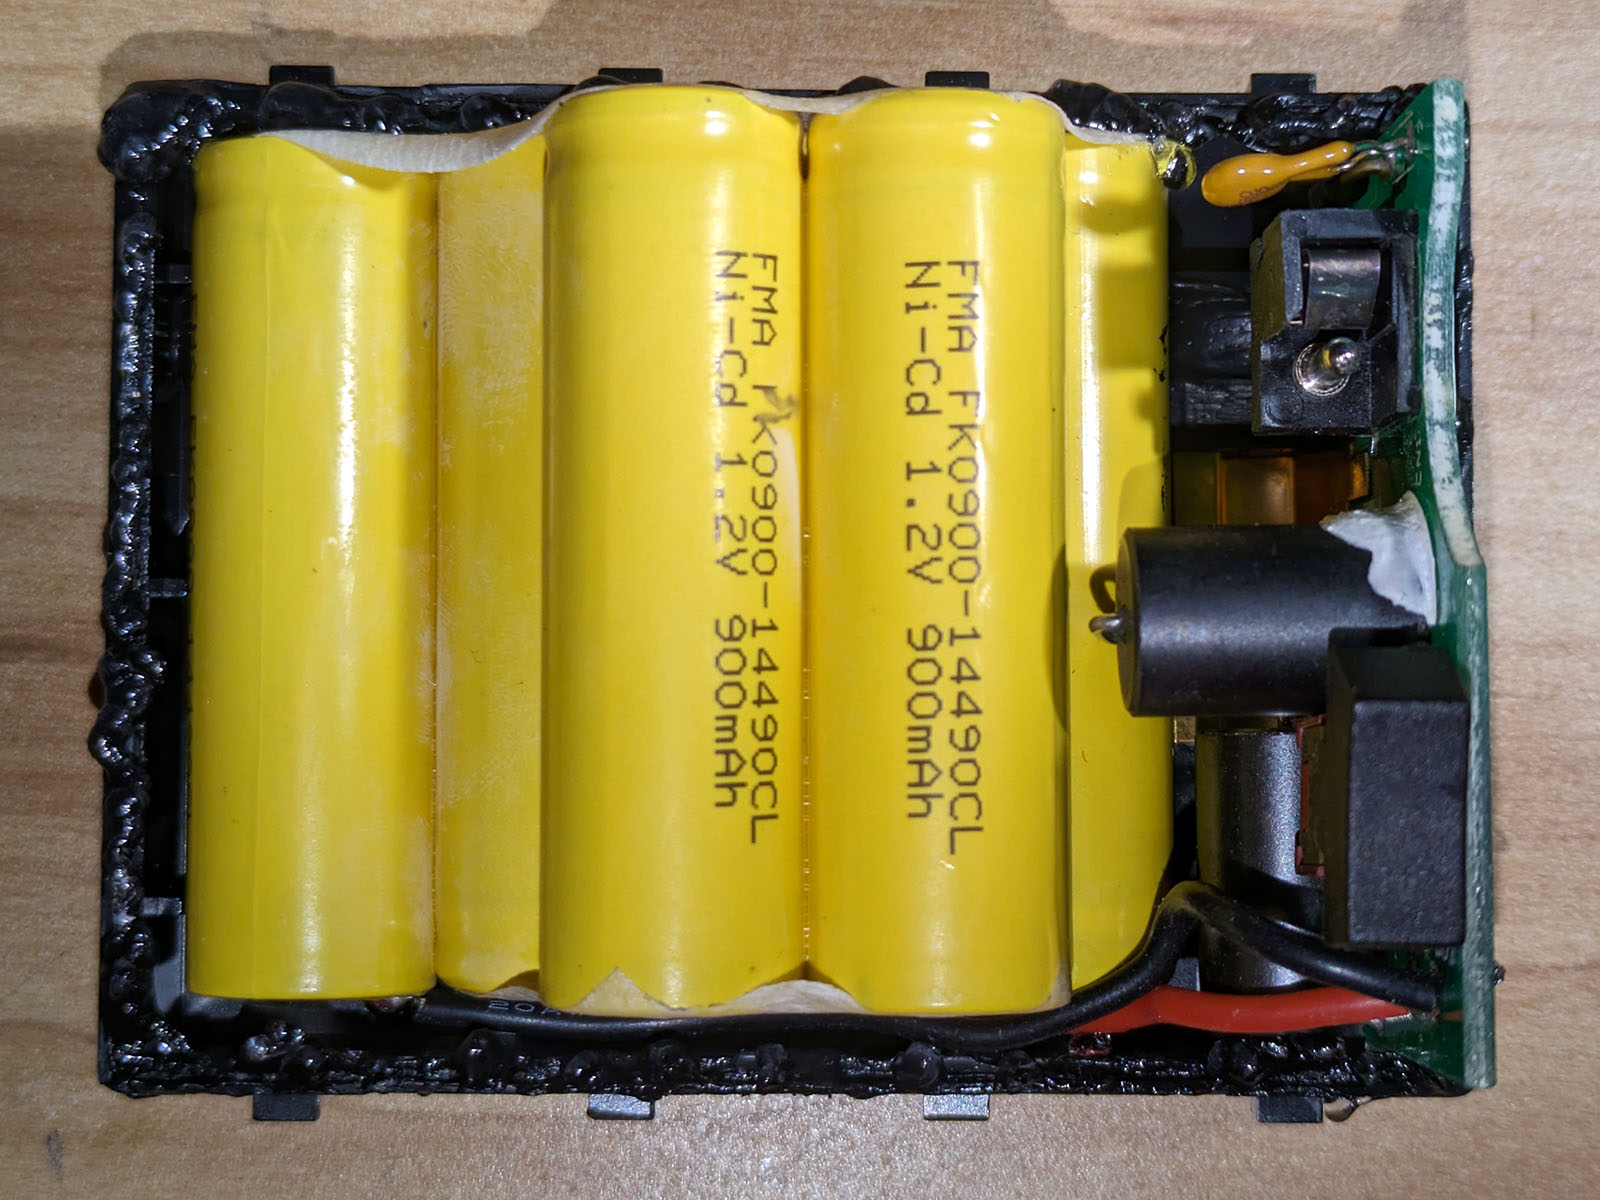
Once you have the halves separated, you will see the circuit board and batteries:
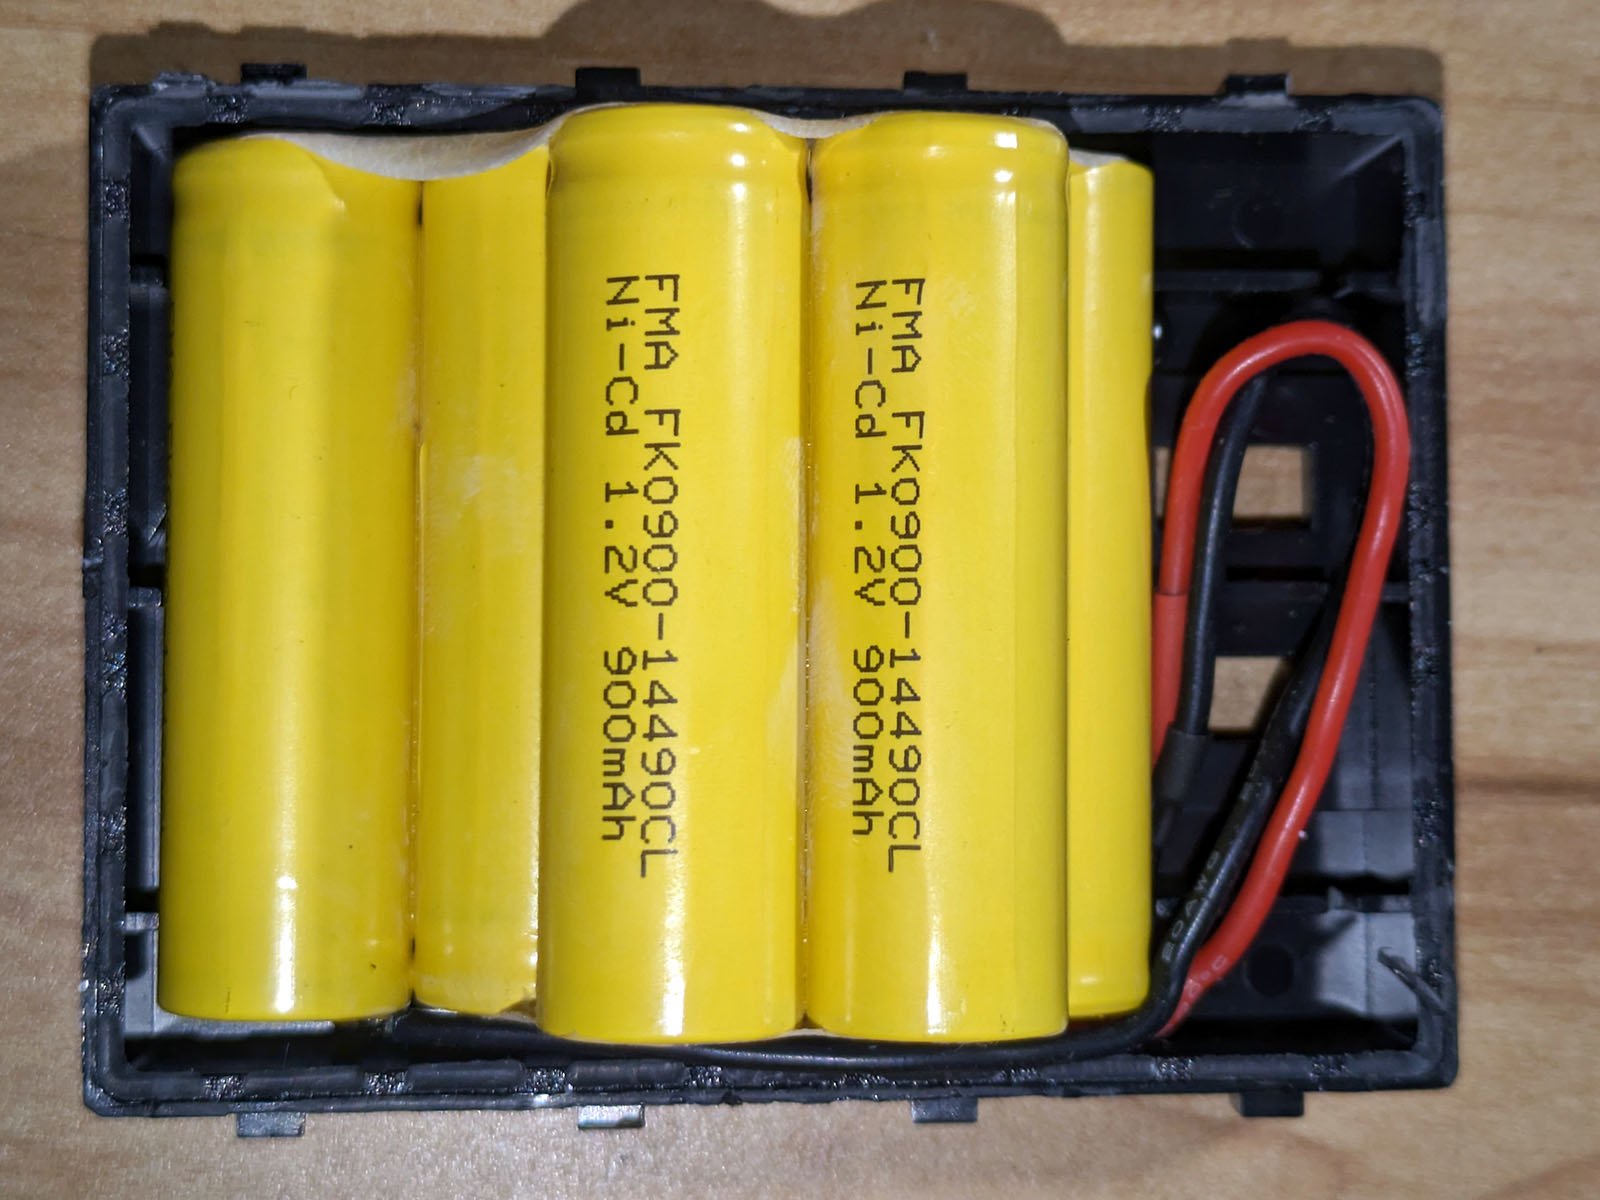
Lift the battery pack out. The circuit board will come with it since it is not attached. If the batteries don’t come out easily, you may need to lift the circuit board out of the way and then gently use the chisel as a pry bar to lift the batteries up. Do NOT cut into or otherwise damage the batteries – you want the chisel between the bottom of the case and the battery pack. Once you have the circuit board and batteries out, they should look like this:

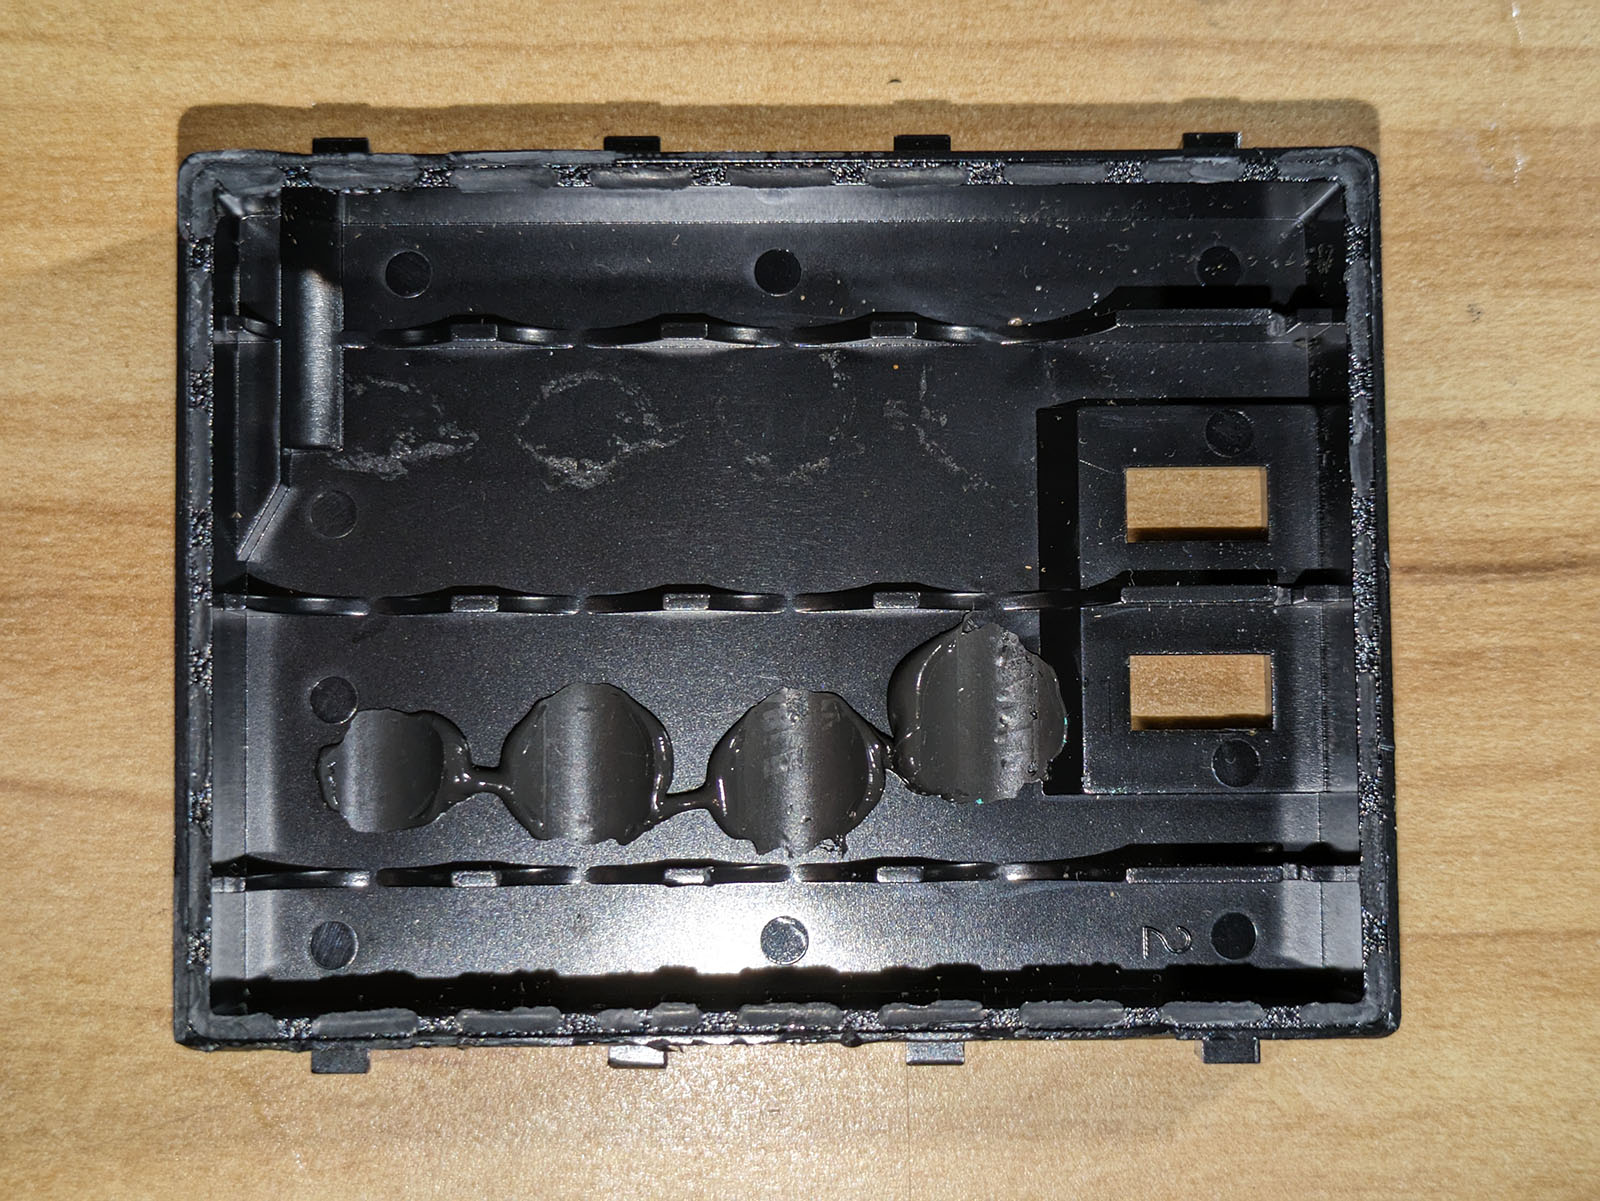
The bottom half of the case may have remnants of silicone caulk attached. If your battery has these, peel them off with your fingers. Particularly troublesome pieces can be scraped off with the chisel.
Use diagonal cutters to cut the red and black wires connecting the battery to the circuit board, one at a time. Do NOT cut both wires at the same time – this will short-circuit the battery if it has any remaining charge.
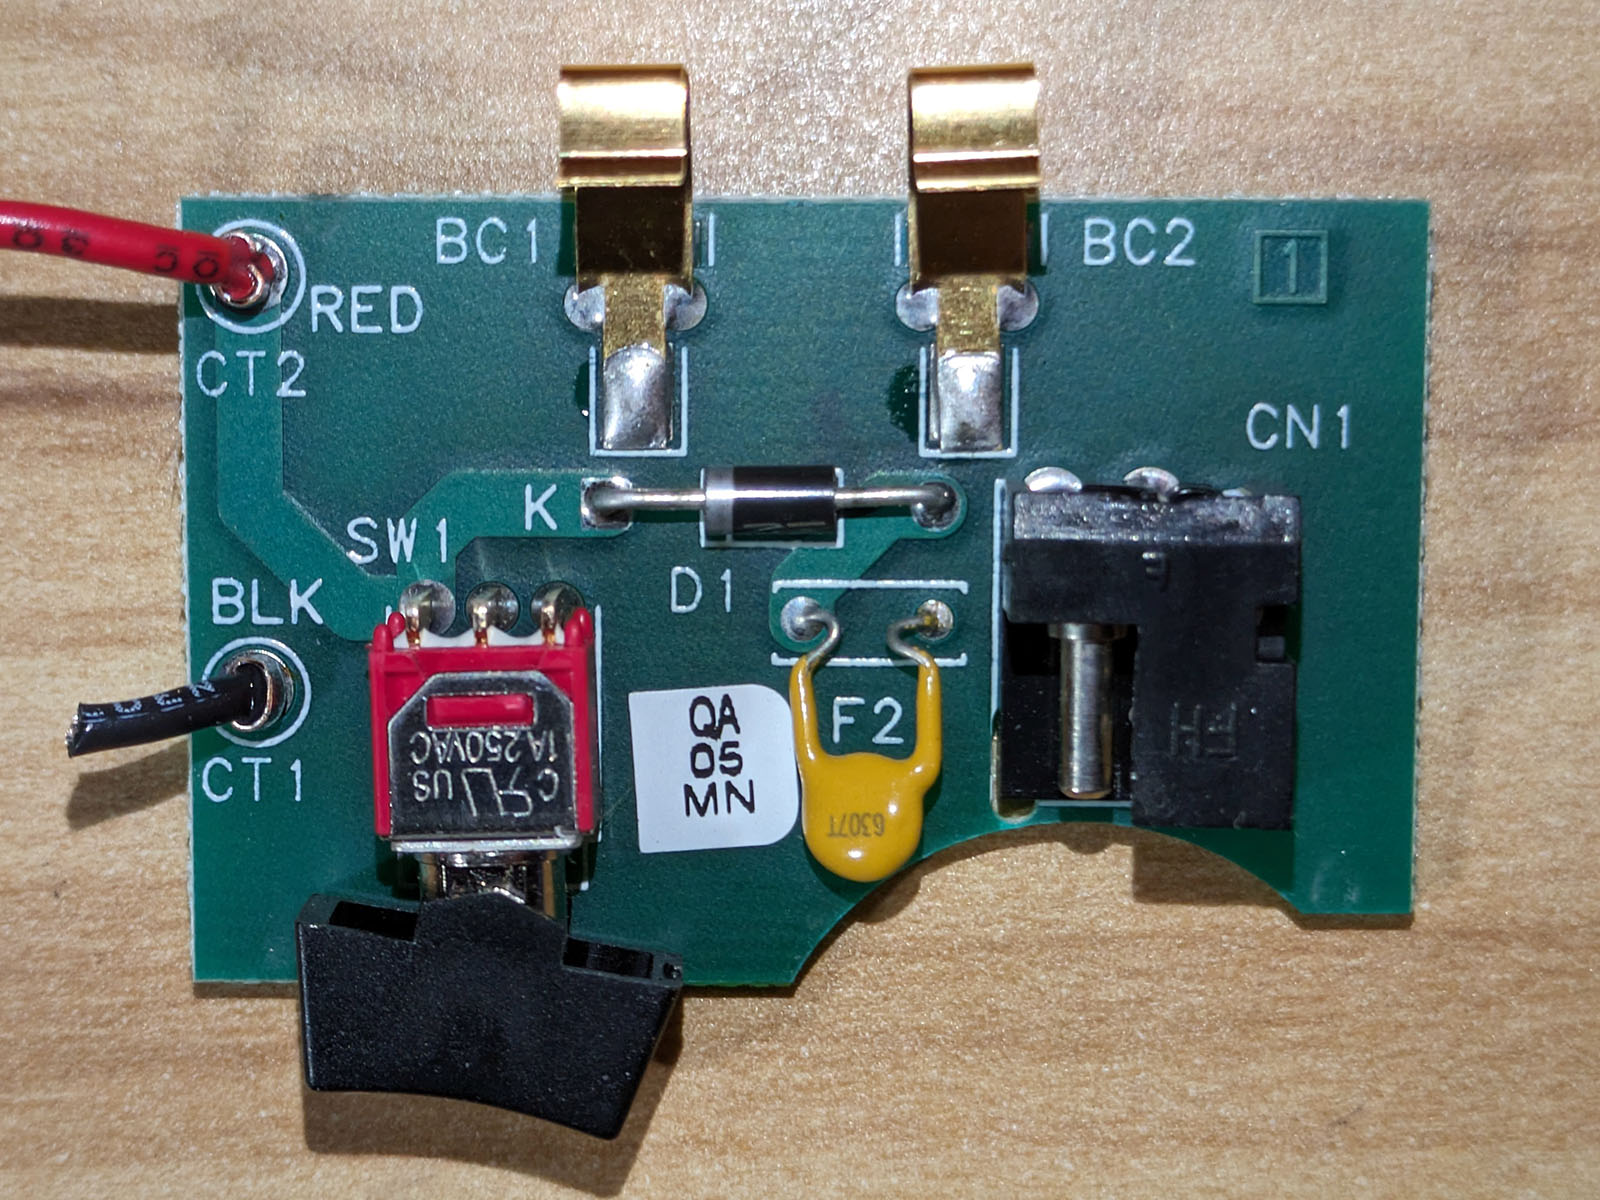
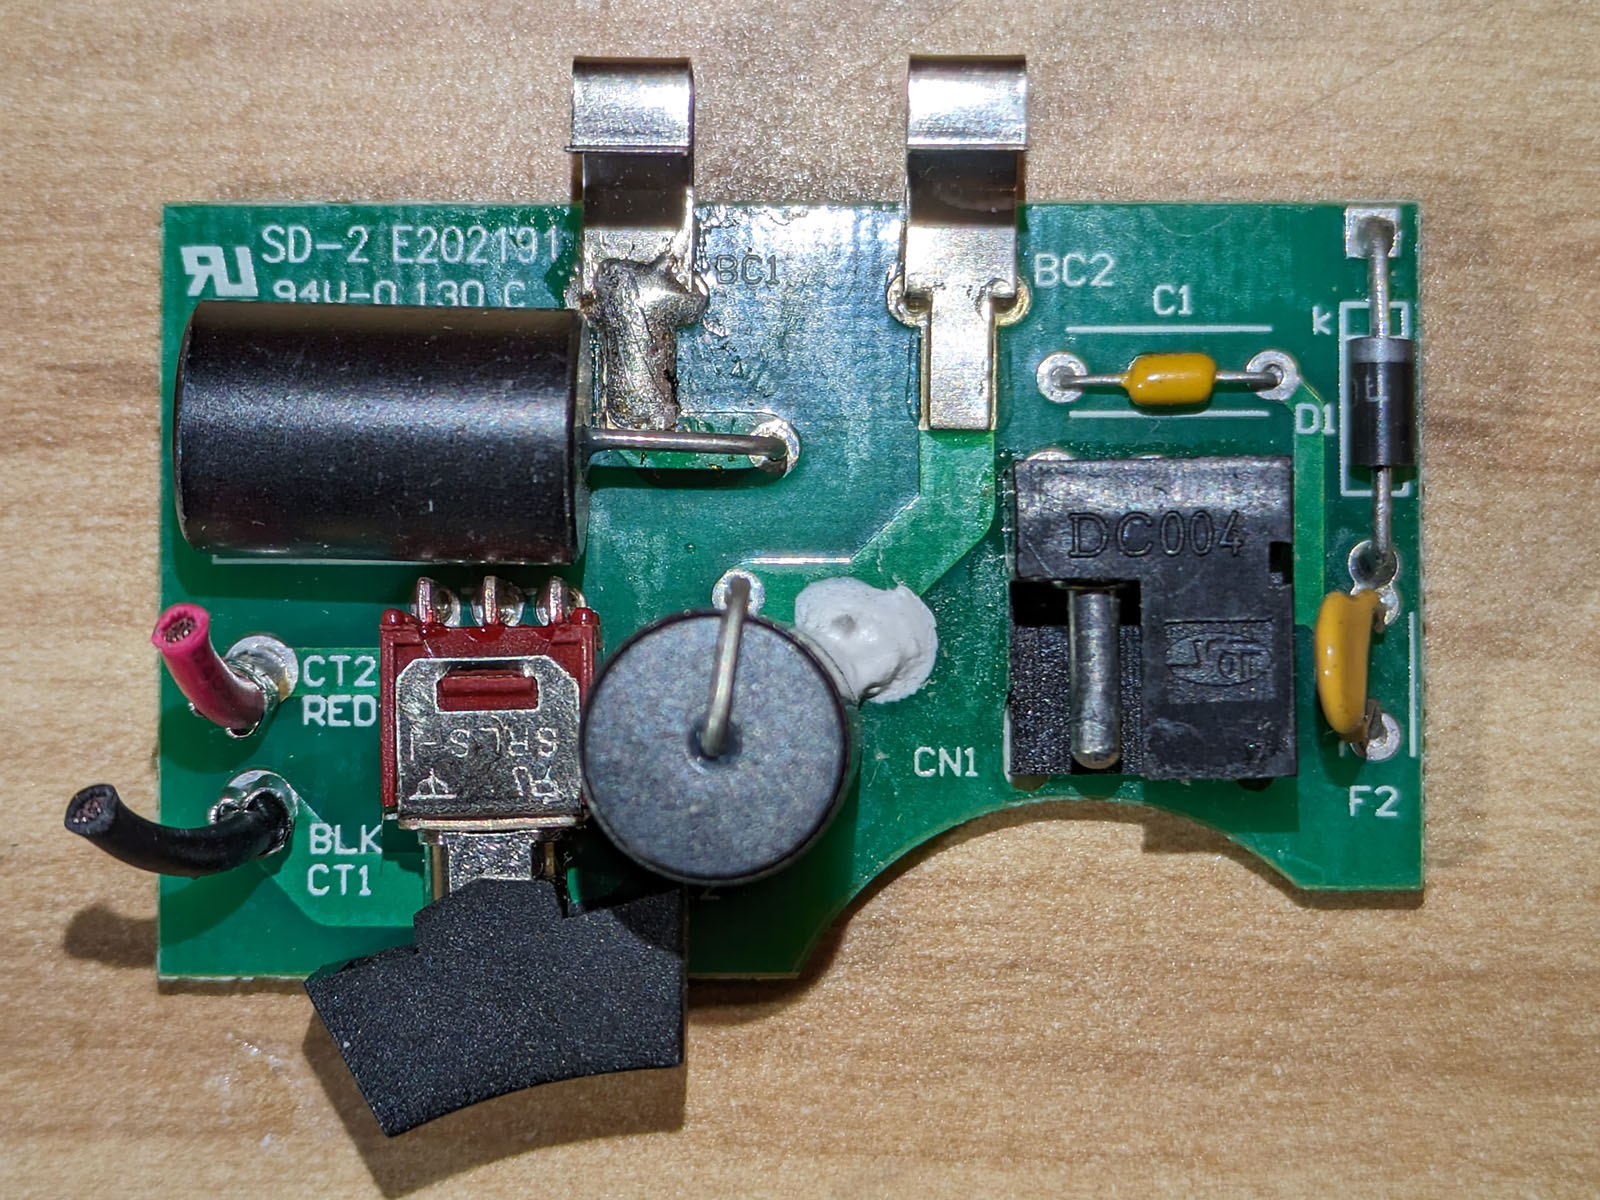
There are two types of circuit board. This is the older style:
This is the newer style:
If you are rebuilding more than one battery pack at a time, use the marker and tape to label each circuit board with the same number as the battery halves it was removed from.
The new battery pack will come with a nice shrink wrapper and label:
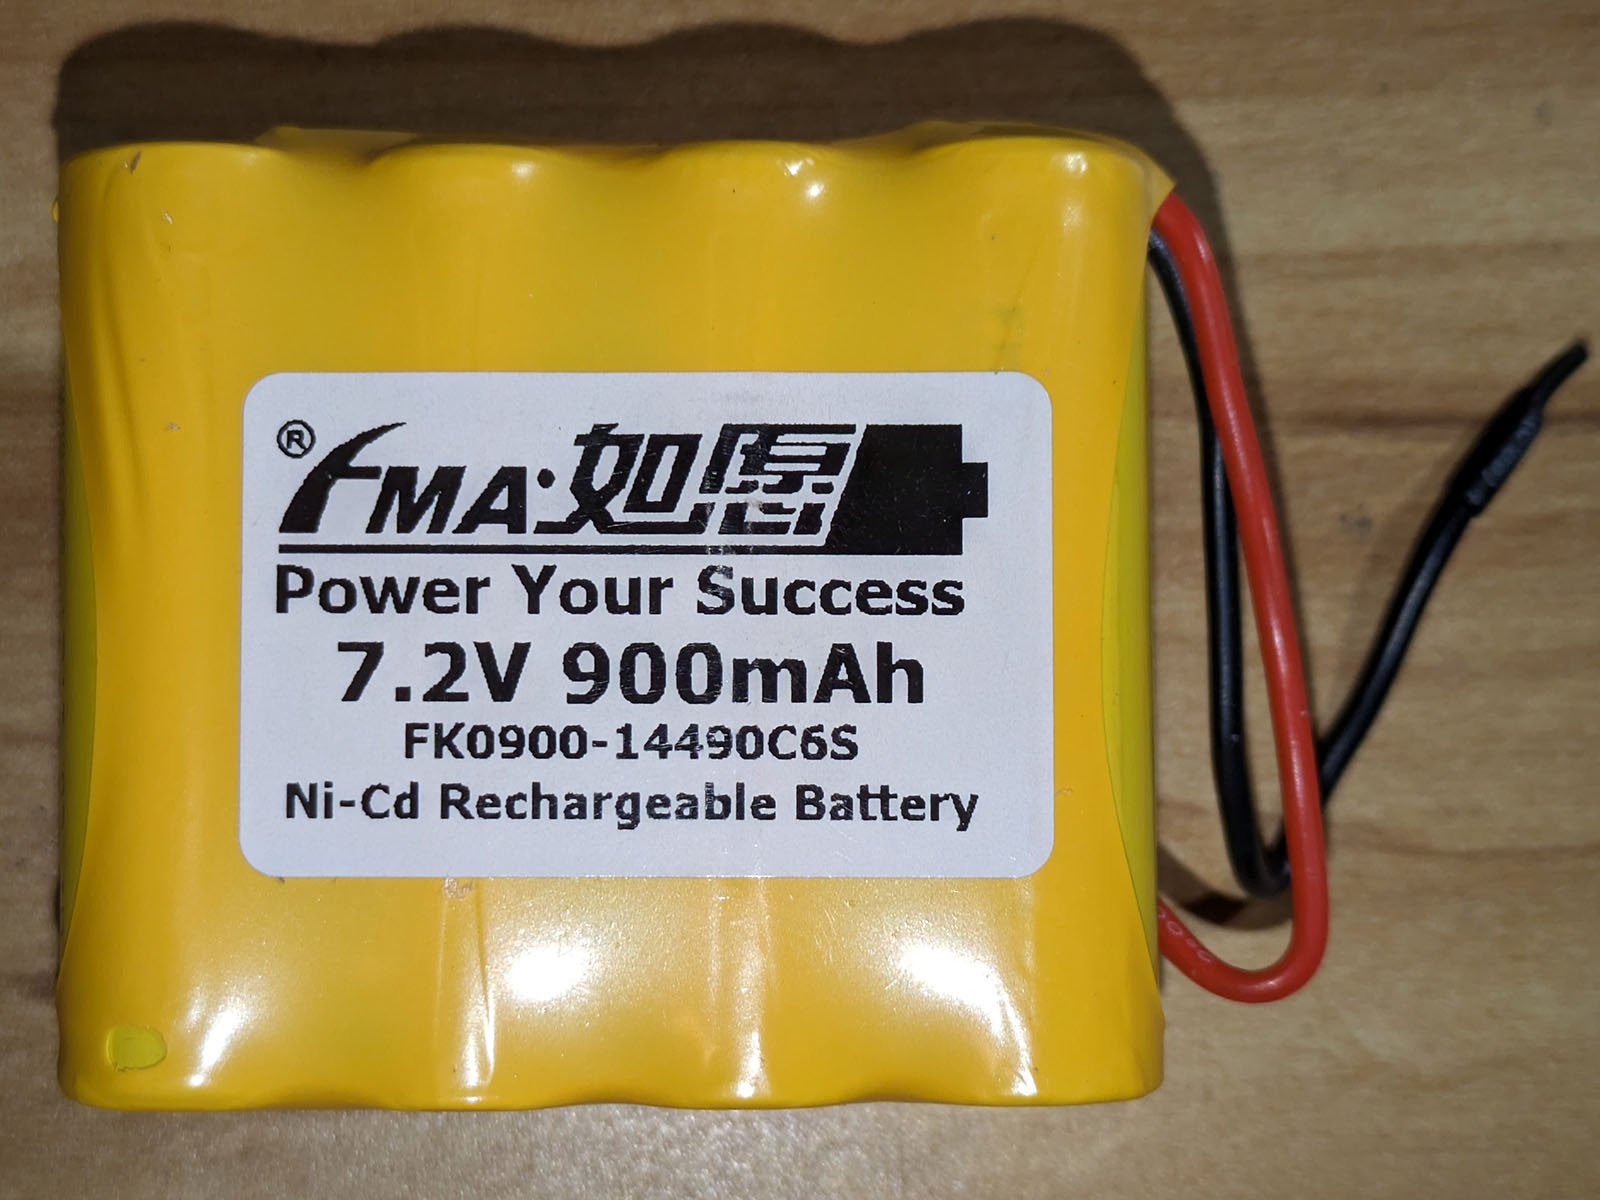
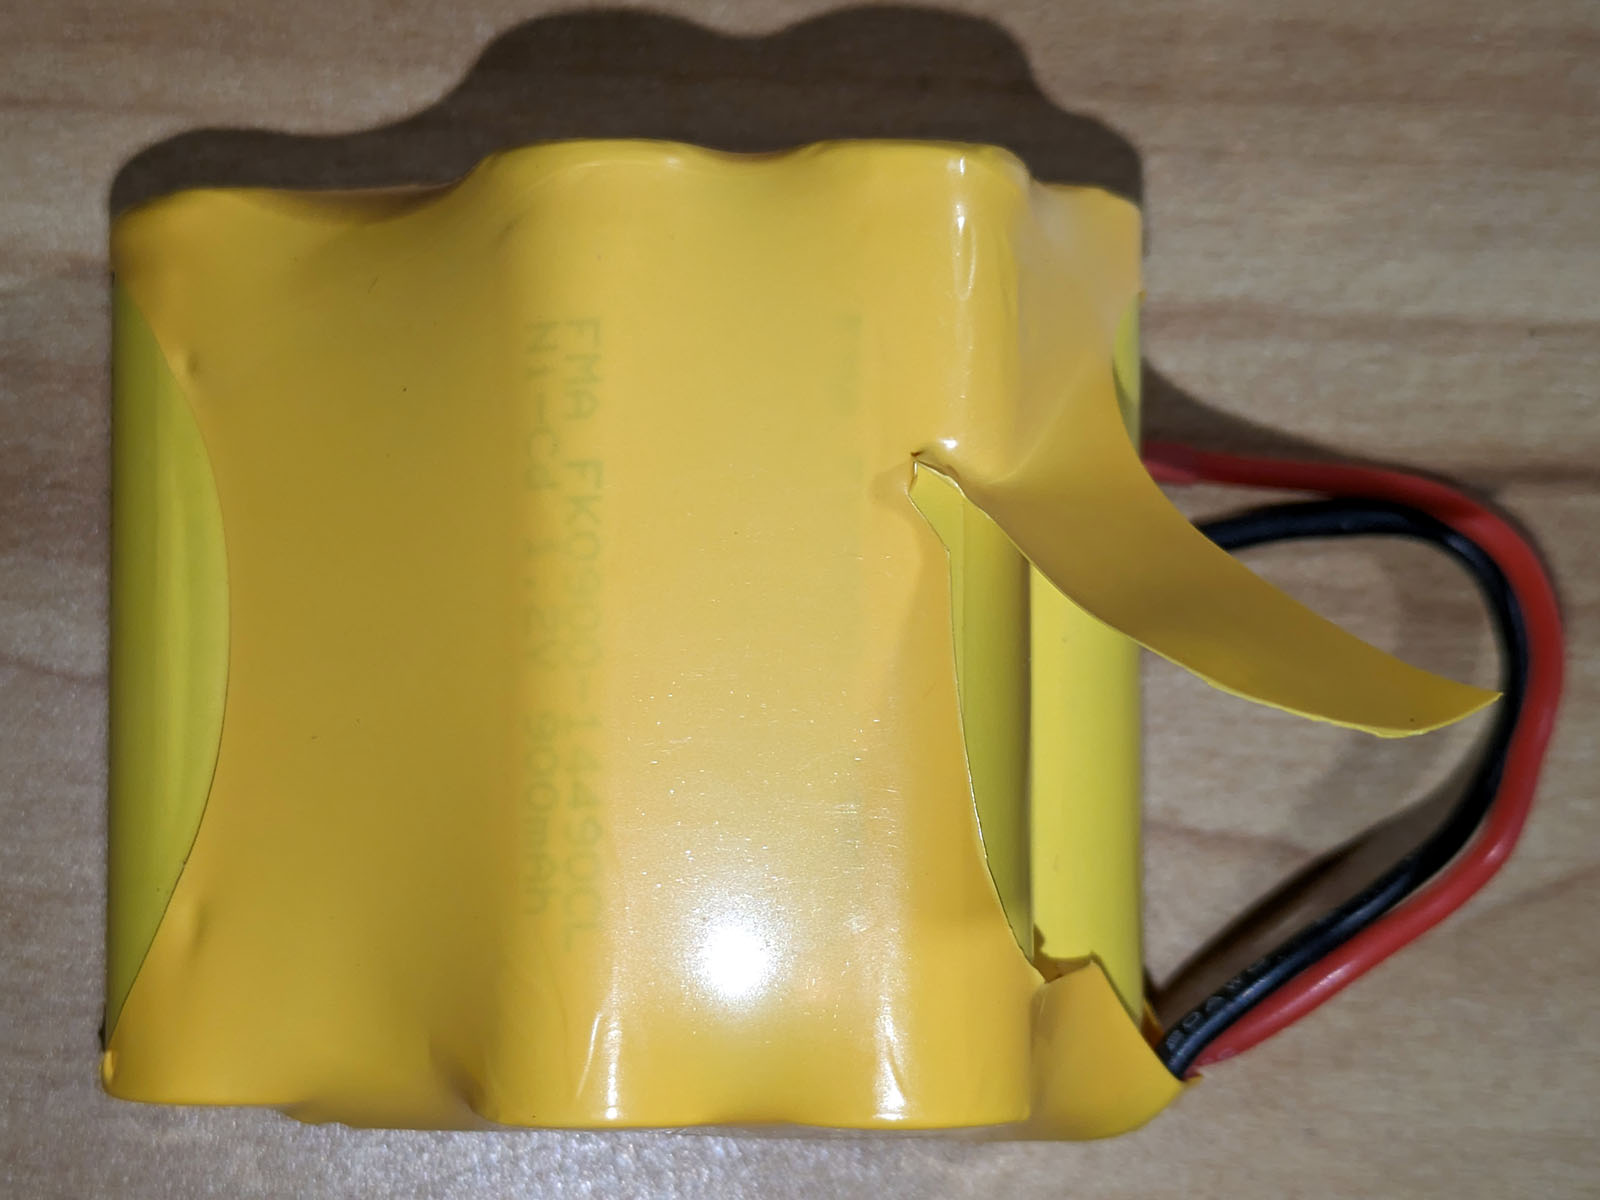
This needs to be carefully removed before installing the new battery in the pack. Use a single-edge razor blade to cut a slit in the wapper at a point where the wrapper is not contacting the battery. Be very careful to not nick the wrappers of the individual batteries, as their wrappers are a similar color. Peel the wrapper off in a spiral motion, as if you were peeling an orange:
Place a blob of black adhesive sealant on each end of the four bottom battery cells:
Place the cells in the bottom half of the battery case. Slide them so that the side without the wires is close to the edge of the case so you have room for the wires later on. Carefully tuck the wires into the area where the circuit board will eventually go, taking care to not get the ends under the battery pack:
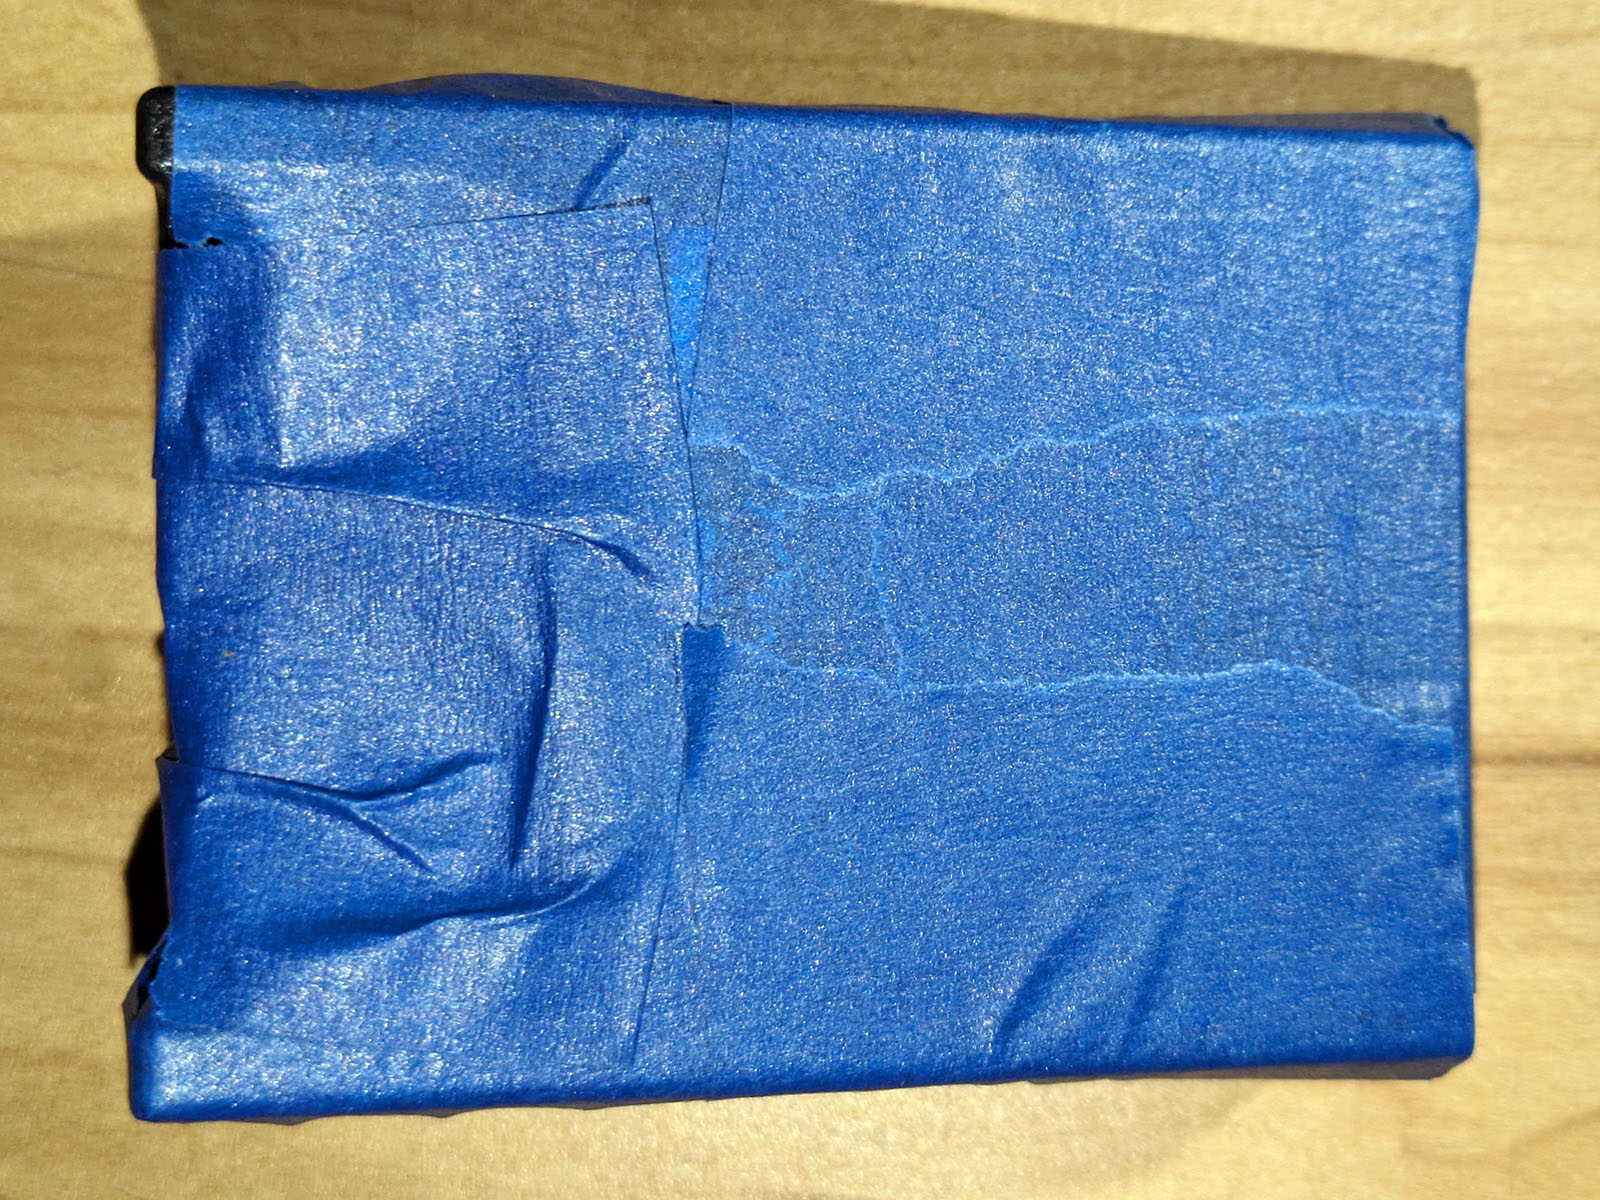
Place the top half of the case on the bottom half. It should have a tight fit along all four sides. Once you have verified that the top is on all the way, use the painter’s tape to tape the battery shut. It is important that the tape be very tight, to make sure that the batteries are pushed as far into the sealant as possible:
Let the battery pack(s) sit for 24 hours to allow time for the sealant to cure, then unwrap the tape that was temporarily holding the battery halves together. If you were using tape to mark which battery half was which, be sure to not remove those labels by accident when removing the rest of the tape.
Using the soldering iron, remove the cut ends of the battery wires from the circuit board and ensure that the holes have been cleaned out:

Cut the battery wires to the appropriate length and solder them to the circuit board. Be sure to work with each wire individually to avoid shorting them together:
Examine the battery pack from the top to make sure that the battery wires are tucked inside the case and not protruding where they would interfere with installation of the upper part of the battery case:

Carefully flip the pack over to confirm that the spring-loaded battery terminals are protruding from the battery pack. You don’t want to have to chisel the pack open again to fix a stuck spring terminal!
After making sure that you have the correct top piece for this battery pack (if you’re rebuilding more than one pack at the same time), run a bead of gel-type cyanoacrylate glue along all four sides of the case. You want most of the glue to be on the area where the case joints cracked during disassembly and not so much along the outer edges:
Place the top piece on the battery pack and squeeze the two halves together, making sure that the halves are fully seated against each other. There will probably be some “squeeze-out” of glue. That’s OK – it means the glue is in contact with both halves of the battery pack. You should remove this excess glue, particularly along the long edges of the battery pack, as this is where the battery retention mechanism works. You can use the cardboard wrapper from the single-edge razor blade or anything else that is convenient to remove the excess glue:

Re-wrap the batttery pack with blue painter’s tape, just as you did while the silicone adhesive was drying. It is important to make this wrap as tight as possible. The glue is the only thing keeping the battery from falling apart during use, so you want as good a connection as possible.
After waiting several hours for the glue to harden, remove the blue painter’s tape. At this time you can also remove any number labels you put on the cases to keep pieces of multiple cases organized.
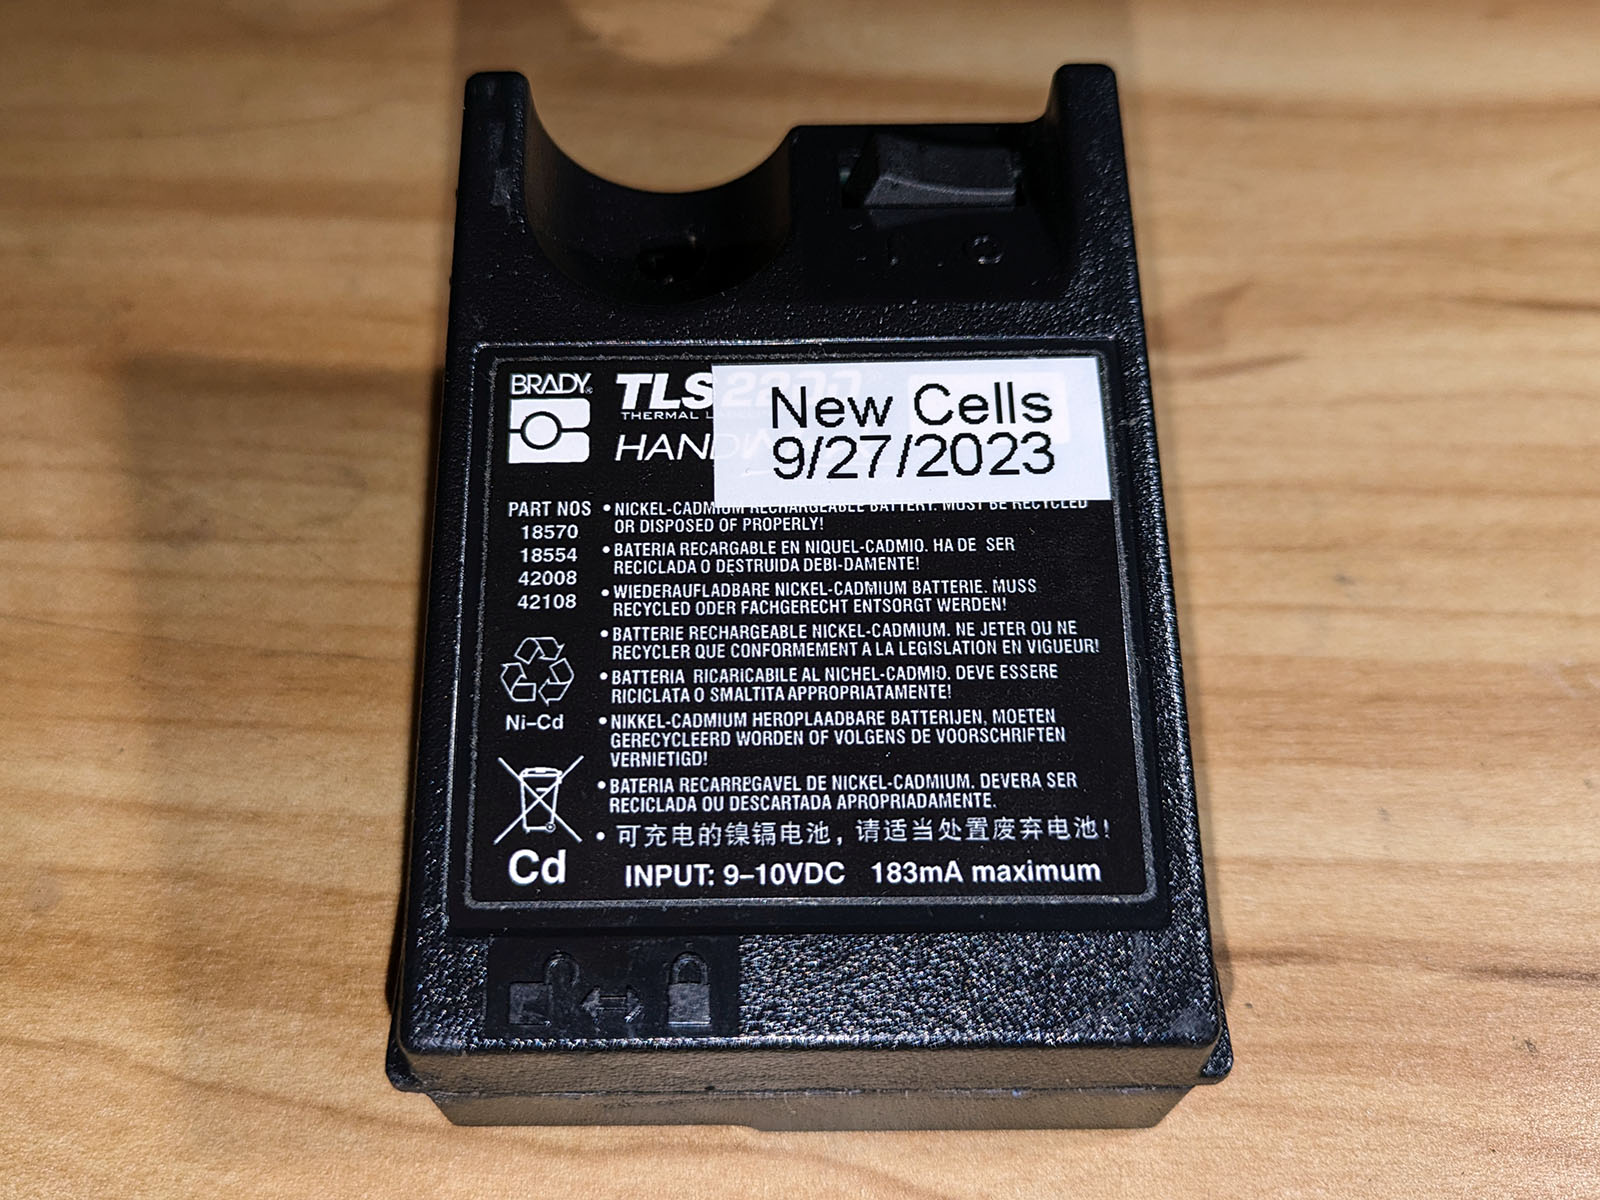
Install a label indicating when the battery was rebuilt. You can always use the TLS2200 to print this label if you don’t have another labelmaker:
If you have a TLS2200 Quick Charger, place the rebuilt battery pack in it and allow it to fully charge, then press the red refresh button on the charger to perform a drain / recharge cycle. If you don’t have the quick charger, use the standard TLS2200 charger to charge the rebuilt battery pack. It may take several charge / discharge cycles for the battery to reach its full capacity.
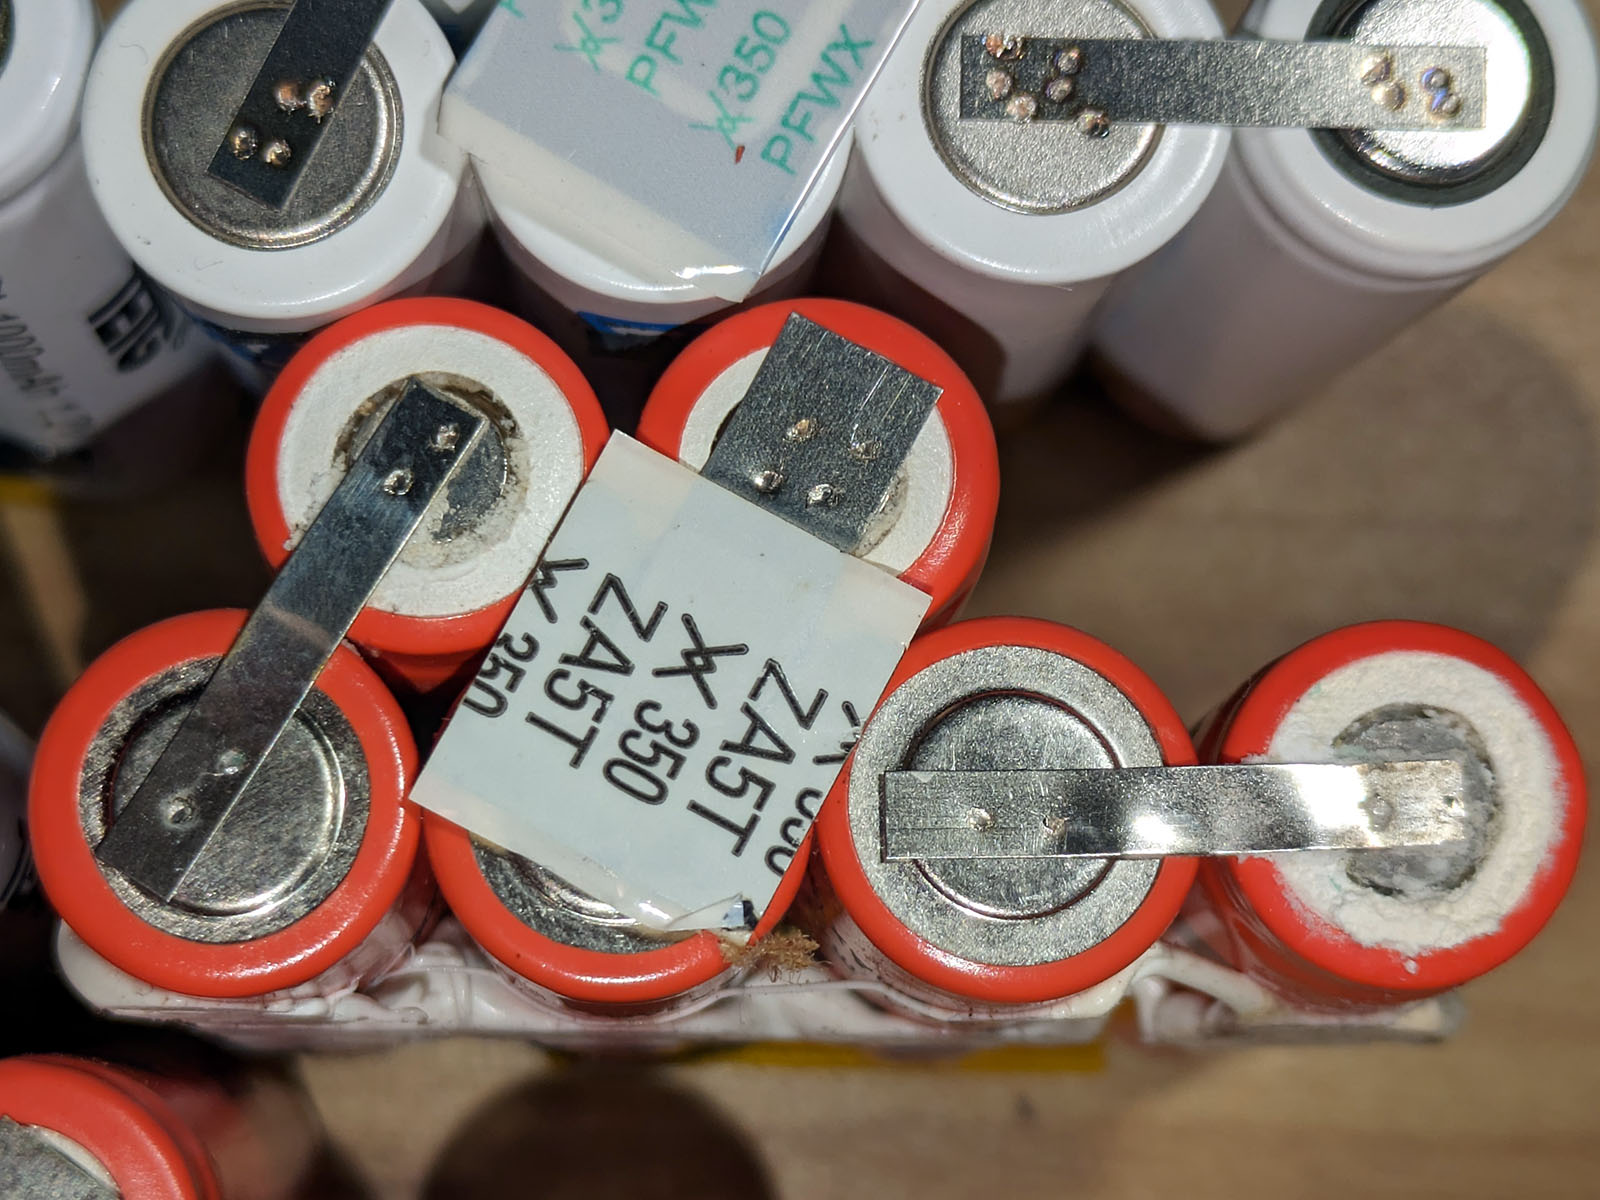
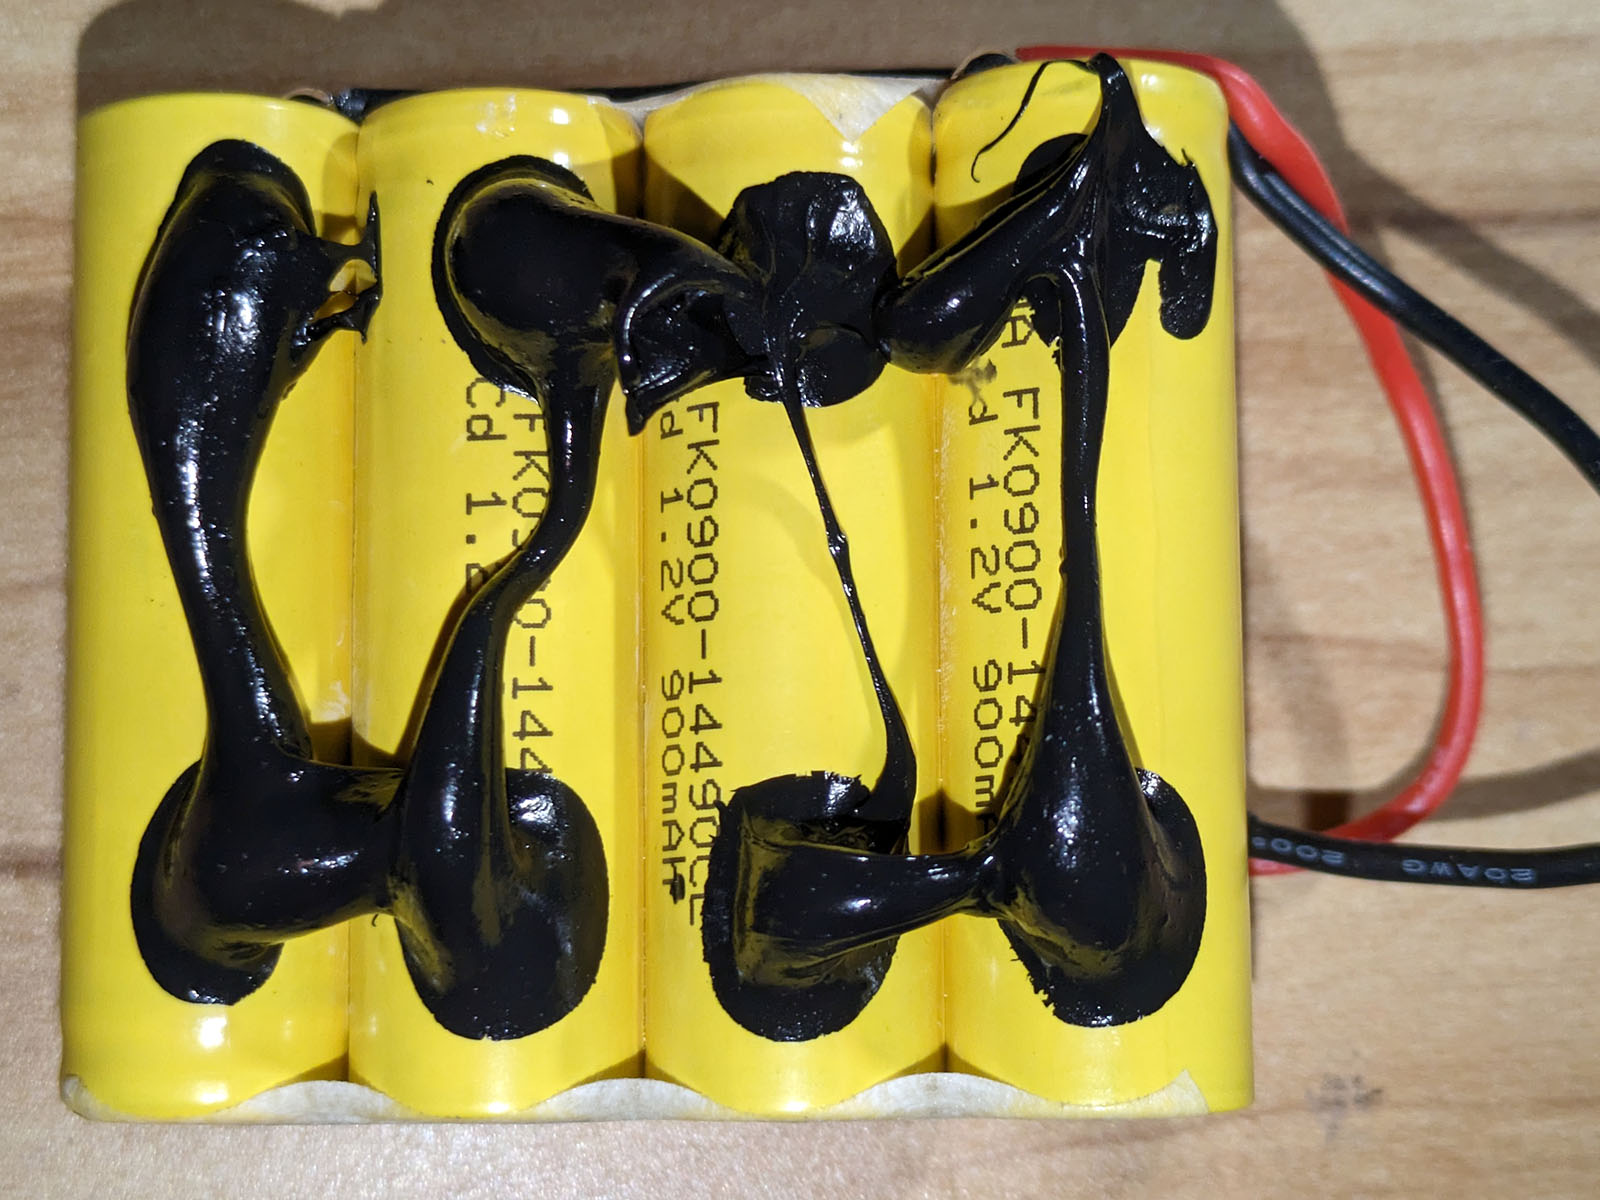
I examined the original cells from 5 different TLS2200 batteries. 2 batteries had cells from SAFT, 2 had cells from TETG, and 1 had cells from GP. Of these, only the TETG cells had visible date codes, which indicated they were from 2000 and 2001. The TETG batteries were the only ones that displayed any sort of leakage (the white powsery substance visible on the upper-left and lower-right orange cells). As these cells are over 20 years old at this point, that may just be normal aging: